
I had Outlook Express installed on my old system and used the Shaw email with it. Now I have a new Windows 7 laptop. How can I get Shaw email on this computer? I don’t see any email program that I can use and desperately need to check the account for some important messages.
Michael Dickerson
Though Outlook Express is missing on Windows 7 operating system, a nicer and better, as some may opine, alternative is available in Windows Live Mail. However, this new email client differs significantly from Outlook Express in the way it organizes email accounts and messages.
Sponsored Links
For instance, there is no common inbox because each account that’s added in the program gets its own set of five folders – “Inbox“, “Drafts“, “Sent items“, “Junk e-mail” and “Deleted items“. So if you have 3 Shaw email accounts, you’ll end up with a 3 inboxes and 15 folders!
Anyway, Windows Live Mail should come as the default email program on Windows 7 and you will find it listed in the program list. You can also get Windows Live Mail for free from the Live.com web site; the installation takes just a few minutes.
By the way, people who have been using Outlook Express (Windows XP) or Windows Mail (Vista) might take a day or two to adjust to the new interface and the different way the messages are segregated in Windows Live Mail. But it’s worth the trouble as this program is probably the best free email client for Windows 7.
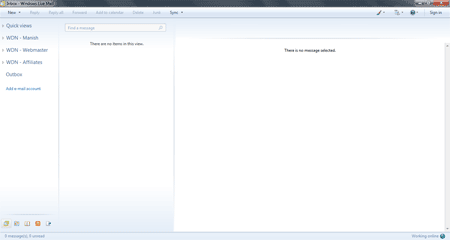
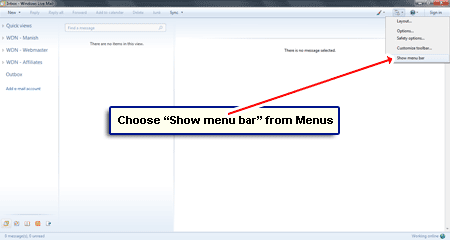
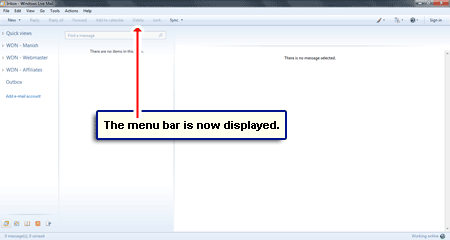
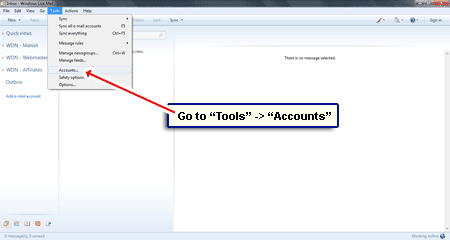
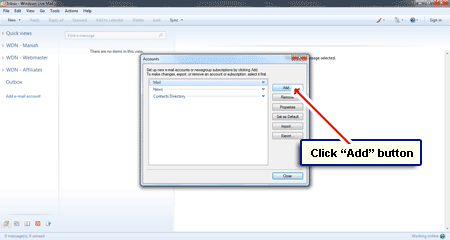
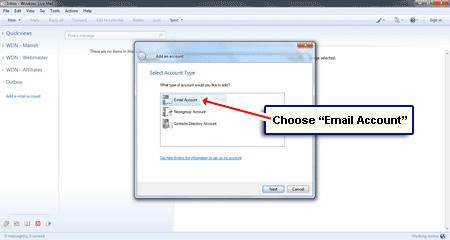
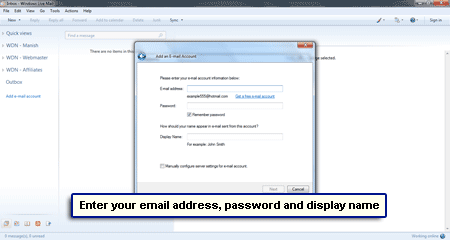
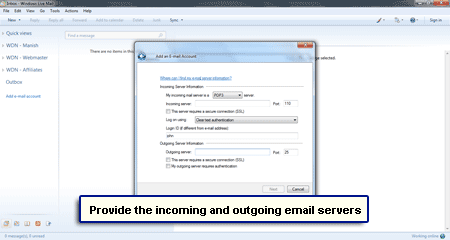
Set up Shaw email on Windows Live Mail (Windows 7)

Below are the instructions to set up your Shaw email account in Windows Live Mail program on Windows 7. However, if you already have it on Outlook Express (XP) or Windows Mail (Vista), you don’t need to do this manually because you can use the import and export functionality of the two email clients to transfer email from old computer to another, the new one. Both email account settings and messages can be copied and moved- refer links at the end of this post.
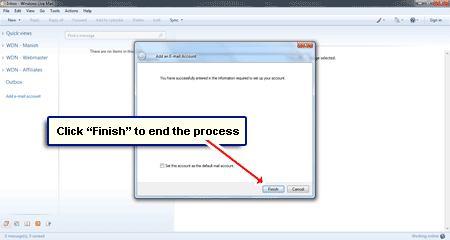
You can now get the Shaw email on Windows 7 through the Windows Live Mail program. The messages will be downloaded and stored on your local computer. If you want to access the account through Shaw email login (webmail) too, please change the settings of the newly configured account so that a copy of the email message is left on the server.


Please assist. I just upgraded from Vista to Win7. where I lost my “Windows Mail” program because it doesn’t work with Win 7. I understand there is a way of retaining my e-mail address. (I have just downloaded Windows Live Mail) which doesn’t allow me to use my regular address.
Will you please instruct me as to how this may be done?
Thanks, William Brooks
@William, You can get Windows Mail on Windows 7 – refer that link for details. However, Microsoft suggests that you shift to Windows Live Mail on the new operating system.
1. You don’t need to change your email address
2. Shaw email address will work without any problems on Windows Live Mail.
Trying to get Shaw email to work. Thanks for your tips.
I am in AZ with my laptop and can receive emails but cannot send. What can I do?
@Barbara Tesluck
You most probably have the SMTP settings and the outgoing email server set up incorrectly in the email program. Please make sure you are using the correct information as described in Shaw incoming and outgoing server and settings.