Windows Live Mail (WLM) is a free email client from Microsoft. It can be installed and set up on XP, Vista and Windows 7 computers. In fact, it comes as the default email program on the Windows 7 operating system.
In this post I shall provide instructions on how to get Windows Live Mail for your computer. Please note, Microsoft urges users of Outlook Express and Windows Mail Vista to move to the newer Windows Live Mail because these older programs are no longer been developed and supported.
Sponsored Links
An important question remains: Should you make the shift from your old email program to Windows Live Mail?
Based on the feedback I receive (daily), not many people like the new email client. I, however, have been using it for almost two years and except for a small problem with the RSS reader (which was ironed out in an upgrade), the program has served me really well. Though it lacks a few ‘advanced’ features of Outlook Express and Windows Mail (like the HTML source view – don’t worry about it if you hadn’t used it ever), it includes an automated junk e-mail filter, an RSS reader a blogging tool and lets you customize the interface and layout. By the way, the one thing most people find annoying with Windows Live Mail is the extreme segregation of email accounts – each email account that is set up in this program gets its own set of five default folders.
Anyway, here are the steps to get Windows Live Mail and install it on your computer.
Get Windows Live Mail – how to instructions
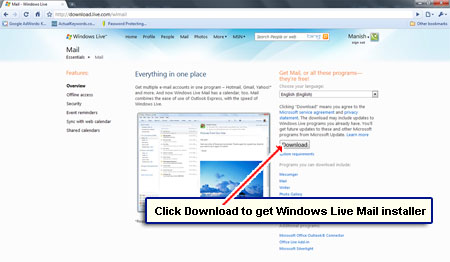
- Go to the Live web site to get the small Windows Live Mail installer file by clicking the “Download” button – [Slide 1]. Depending on your browser and its settings, you would either ‘run’ the installer immediately or first save it and then double-click to run it once it’s downloaded.
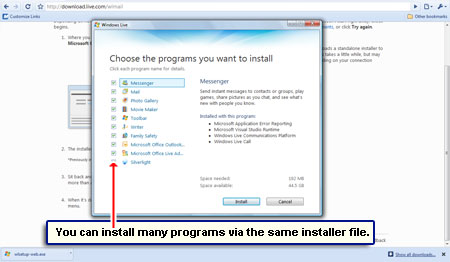
- Though this one installer, you can not only get Windows Live Mail but also many other programs. Place a checkmark before the ones you want – [Slide 2]. In the interest of time, I shall be concentrating only on Windows Live Mail, so make sure Mail is selected. Now click the “Install” button – [Slide 3].
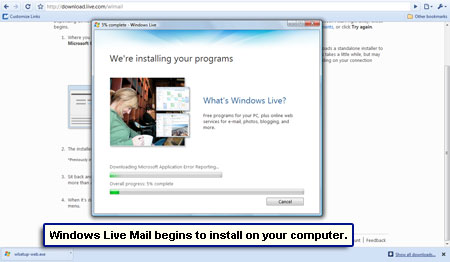
- The installation process for Windows Live Mail will begin and the status will be displayed in the bar. The progress will depend on the internet connection speed – [Slide 4].
- There is no particular need to check the first two options in the next window if you are happy with your current search provider and the home page. However, I do suggest you put a check mark in the last one because it will help make Windows Live Mail better – [Slide 5].
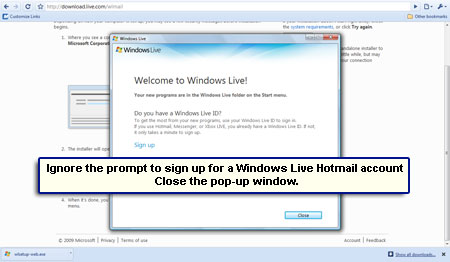
- If you have a Hotmail (Windows Live Hotmail) email account, Windows Live Mail lets you download and store the messages on your computer. This means you will be able to check your old emails even without an internet connection. But Hotmail setup on Windows Live Mail can be done later (refer that article for instructions), so ignore the “Sign up” prompt and click the “Close” button – [Slide 6].
- Congratulations! You have now installed Windows Live Mail on your computer.
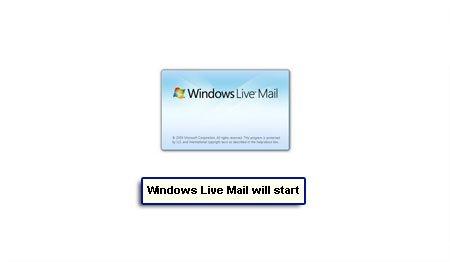
- The program will start on its own and if you are on an XP computer, Windows Live Mail will automatically import the email accounts settings and messages from Outlook Express – very convenient. The new email program is ready to use – [Slide 7].
- As you can see, the interface is quite different from both Outlook Express and Windows Mail Vista. But trust me, you will get used to it quickly – [Slide 8].
Once you get Windows Live Mail on your computer, you may also be interested in:


I have Window Live Mail. Can I delete it and only use Windows Mail?
@Veronica
Yes you CAN use Windows Mail on Windows 7 (I suppose that’s the operating system you have, right?). But I wouldn’t recommend that you do as the older email program is no longer being developed and supported by Microsoft. Any case, refer the following two links for further help:
Get Windows Mail on Windows 7
Install Windows Mail on Windows 7