
Because of the inadequate space available on the email accounts (just 50MB, at the time of writing), it is a good idea set up the Windstream email on your Windows 7 computer using the free Windows Live Mail program. Once this is done, you don’t need to delete messages to recover space or worry about exceeding the allotted quota, assuming there is enough free space available on your computer’s hard disk.
FYI, the instructions on this page are for setting up the Windstream email account on Windows Live Mail using the POP email protocol. You could also use IMAP which will keep the account synchronised across the various devices you use to access email.
Sponsored Links
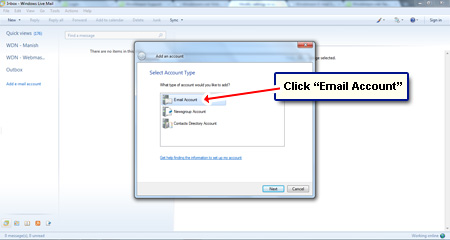
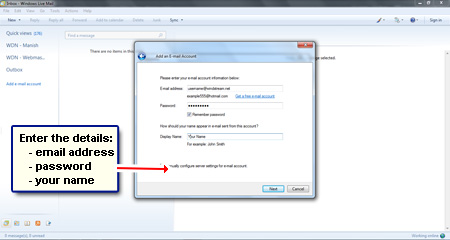
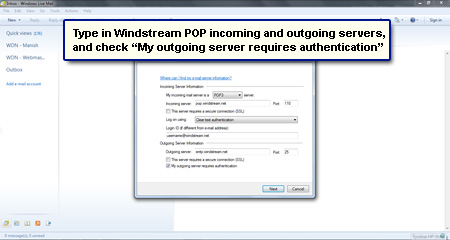
Windows Live Mail is the default email program of the Windows 7 operating system. It should come pre-installed, but in case it’s not there, you can quickly download and install it on your computer – it’s 100% free. We will use the POP email protocol to set up the email account in this program and for this we need the username and password and the Windstream incoming and outgoing email servers.
Set up Windstream email on Windows 7 – Windows Live Mail
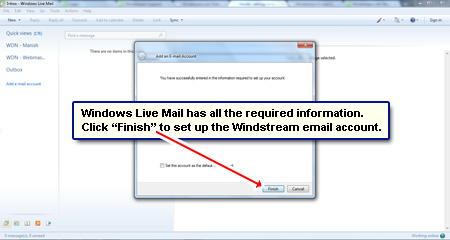
The instructions to get Windstream email on your Windows 7 computer are below – we would be using the default Windows Live Mail email client. Please refer screenshots when in doubt.
Remember, there are two ways to access an email account – you can either use the Windstream email login via webmail or download messages with an email client. Both these options have their advantages and the choice is entirely up to you and how you plan to use the email account.
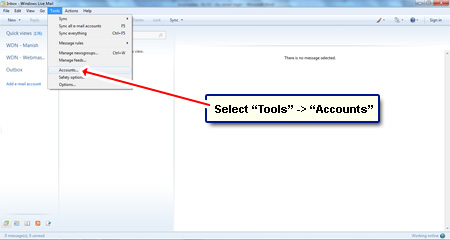
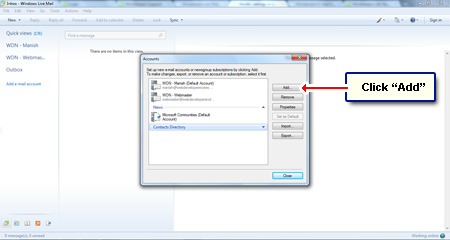
By default, messages downloaded from Windstream account to your Windows 7 computer will be deleted from the server. If you don’t want this, modify the account settings: “Tools” -> “Accounts” -> Select the account -> “Properties” -> “Advanced” tab -> Put a check mark in the “Leave a copy of messages on server” box. You can read more about this in how to retain copy of email on server.


Nice and easy directions on email settings. Thank you