This article will help you make a login page even if you don’t know any programming. Obviously, when things have been oversimplified, there will be some ‘catches’, right? And yes there are.
The first assumption is that your site runs on the Apache web server. And second, the control panel through which the web site is administered has a “password protect directory” – most hosting packages offer this. Note: Other web servers may have an equivalent feature. Please check with your web host provider for details.
Sponsored Links
Log in at the control panel and hunt for the “password protect directory” tool. If you can’t find it, contact the web host. By the way, as long as the site runs on Apache web server, you can still make a login section even without the convenient directory protect tool. This involves fiddling around with the .htaccess and .htpasswd files of the server software. Please refer the last section on this page for details.
How to use directory protect to make a login page on your web site
The screenshots are presented in a slideshow below. These have been taken from the LunarPages web hosting control panel and might be different for you in which case I advice a dash of common sense.
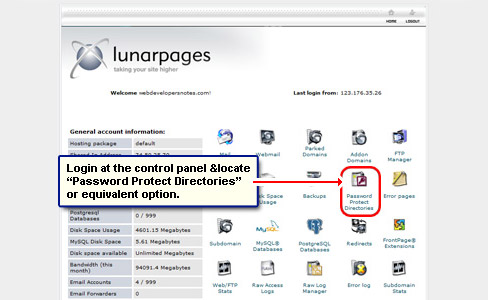
Login at the web site control panel.
Click on Password Protect Directories or equivalent option.
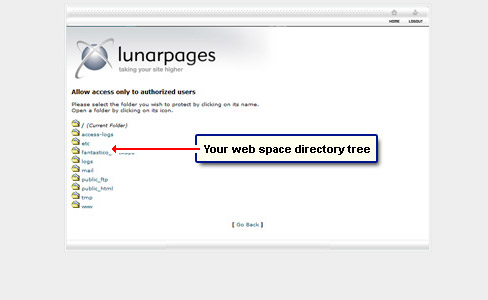
You will be presented with the list of directories on your web space.
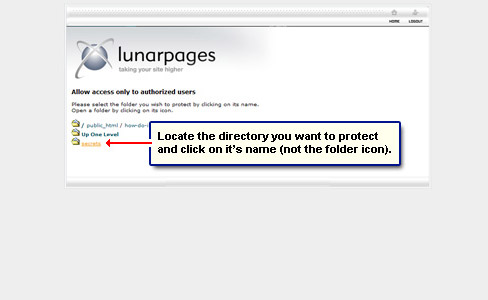
Move down the tree and open the directory you want to protect. Remember, you need to click on the directory name and not the small folder icon in front of it.
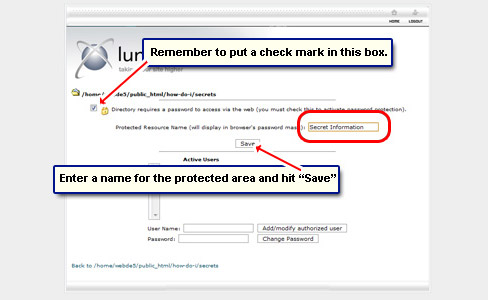
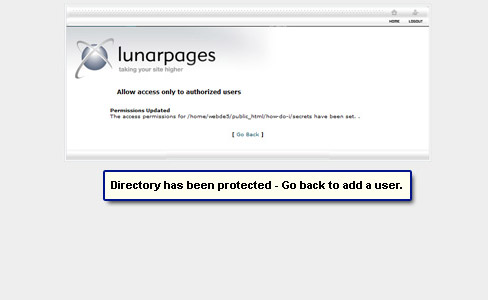
Put a check mark in the box – Directory requires a password…. Enter a Protected Resource Name and click the Save” button.
The Protected Resource Name is used in the small browser pop-up through which you provide the login details (more on this later). The directory of your choice is now protected.
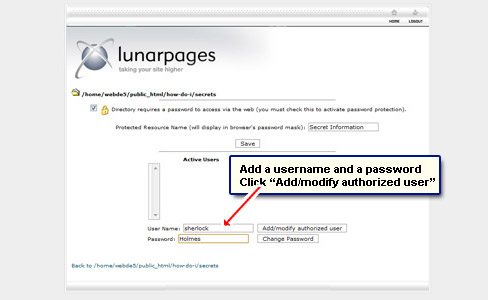
The next step is to set up login information (username and password) for this directory.
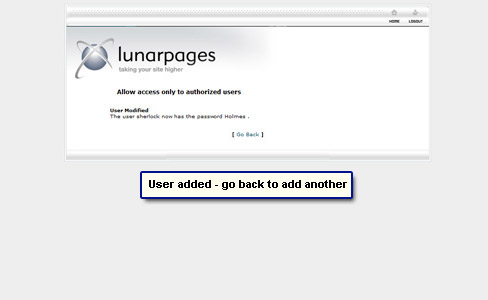
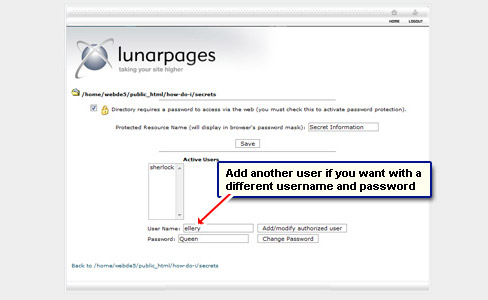
Populate the User Name and Password fields and hit the Add/modify authorized user button to get a confirmation.
Now only those people who know the correct username and password will be able to access the contents of the protected folder. In our example, the username was “sherlock” and the password “Holmes” (both without the quotes).
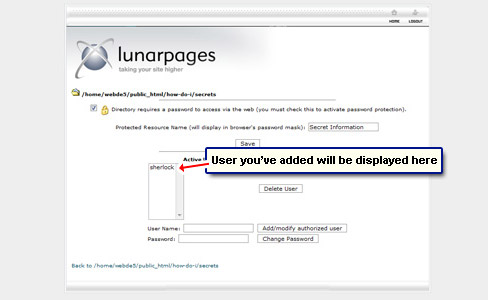
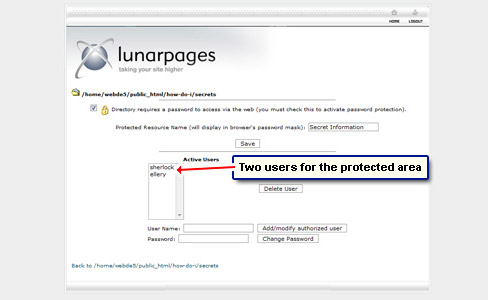
If you like to give access to this protected folder to group of people, you can either set them as individual users or provide the same login details to all. Thus, you can add more users if you so want which will be displayed in the list.Simply repeat the steps of setting up the username and password.The Delete button will get rid of the user.
Testing your login page
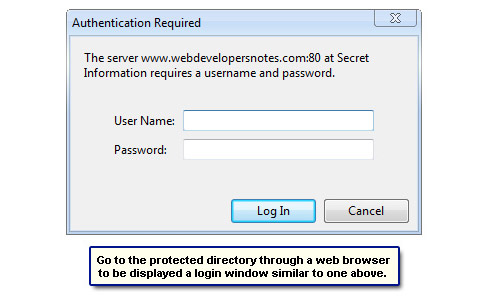
Technically, you didn’t make a login page but rather create a protected area. The username and password fields will be presented to the visitors when they want to access the contents in this shielded section. The login information is requested through a small pop-up window displayed by the browser. The look and feel of this window depends entirely on the browser.
Open a browser window and go to the protected directory by typing in it’s full URL. You’ll get a small pop-up login window which asks for the login information. Enter the username and password (of any user) to access the contents in this folder.
Example of a login page made with this method
Click “Top Secret Area” to access the protected folder I’ve created with the steps detailed above. I’ve added two users each having their own username/password combination.
Username: sherlock Password: Holmes
Username: ellery Password: Queen
The method detailed uses HTTP authentication – a cool techie term to impress your friends with. And as I mentioned before, it will work if your web site is on the Apache web server. FYI, almost half of the world’s web sites are running on Apache – check the Netcraft survey. With HTTP authentication you make a login page on your web site to protect the contents of an entire directory.
Use Apache’s .htaccess and .htpasswd files to make a login page
If you don’t have a Password Protect Directories option in the Control Panel don’t worry. The exact same functionality can be set up through Apache’s .htaccess and .htpasswd files.
The best part is that you don’t need to tinker around with the contents of these files. Simply use Htaccess Tools free service to create .htaccess and .htpasswd files. Check the Htpasswd generator on the web site.
The .htaccess file placed in the protected directory once you make the login window looks something like the one below:
REALM is the protected resource name – Secret Information in our example. It is displayed in the small login pop-up window. As mentioned before, the layout and ‘prettiness’ of this window depends solely on the web browser and you have no control over how it looks.
The PATH-TO-THE-PASSWD-FILE points to the location of the file that stores the username and passwords of users who can access the protected area. The file is, typically, tucked away in a safe directory on your web space. Though the file can be opened and viewed in a simple text editor, the actual password is encrypted.
So here were two ways to set up a login page/area on your web site both of which lead to the exact same result. One involved using the Password Protect Directories feature in the Control Panel while the other was a more “getting-your-hands-dirty” approach.