This is a hands-on guide that details how to create and set up a MySQL database via the cpanel on your web site hosting plan. The instructions are accompanied by screenshots presented in the slideshow. Please refer to them in case of doubt.
The only thing I assume is that you hosting company has provided a control panel (cpanel) through which you manage and administer the web site. You can check up with your web host provider if they offer the cpanel for your web site.
Sponsored Links
MySQl database creation and set up
There are two main steps. The first is the actual creation of a database and a user. The second is “associating” the user to the MySQL database. The only software you require is the web browser.
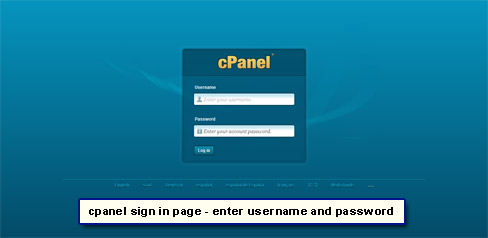
- Launch a web browser window, point to the control panel of your web site and login [Slide 1]. The cpanel web address will typically be www.[YOUR-DOMAIN-NAME]/cpanel.
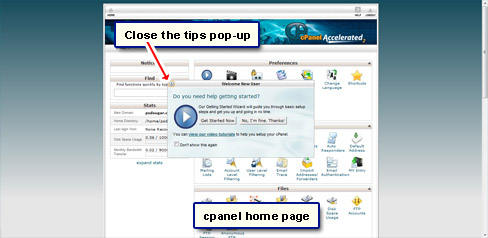
- Close the tips pop-up [Slide 2].
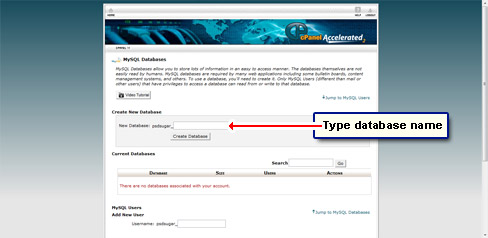
- Scroll down to the “Databases” section and click the “MySQL® Databases” icon [Slide 3].
- As shown in the screenshot, there are presently no databases on the web site. Type in a database name in the blank field [Slide 4].
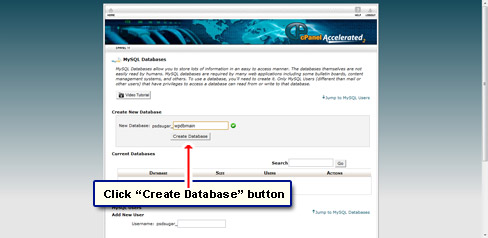
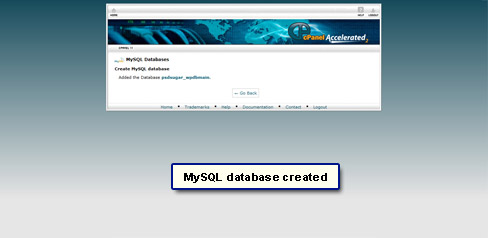
- Click the “Create database” button [Slide 5].
- The MySQL database will be created on the web site server space [Slide 6]. Return to the previous screen.
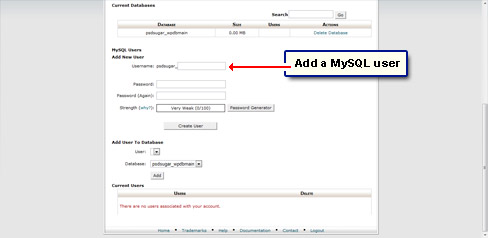
- We now need to add a user for the database we’ve just made. Scroll down a little and get to the “MySQL users” section [Slide 7].
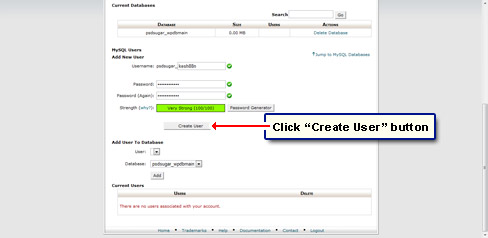
- Enter a username and then the password (in two fields) [Slide 8]. A Password Generator button is conveniently placed beside the ‘Strength’ bar. You can use it to create a strong password for the MySQL user. Click “Create User” button.
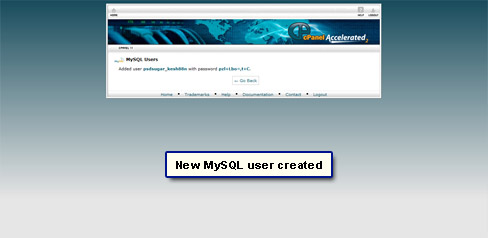
- A MySQL user will be set up; click “Go Back” to return [Slide 9].
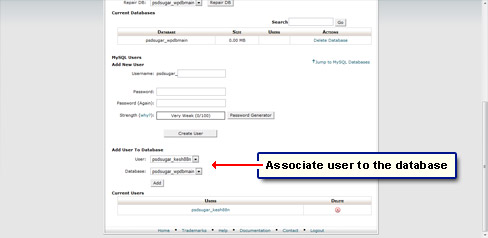
- The new MySQL user has to be “added” or “associated” to the database. Select the options from the drop downs (there would be only one in each if it’s the first time you are doing this) and click “Add” [Slide 10].
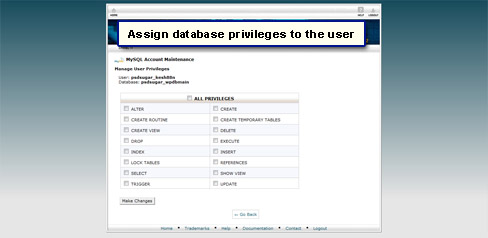
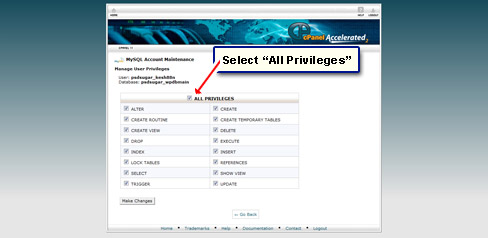
- In the next screen, you are asked to assign various privileges to the user for the selected database. Select “All Privileges” which will enable the user to do everything [Slides 11 and 12].
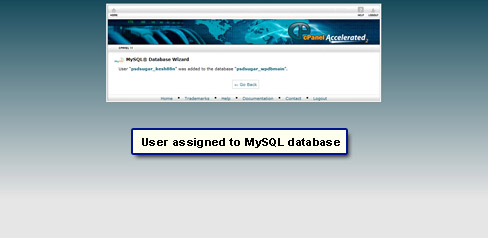
- After clicking “Make Changes”, the system will inform you that the user has been added to the MySQL database [Slide 13].
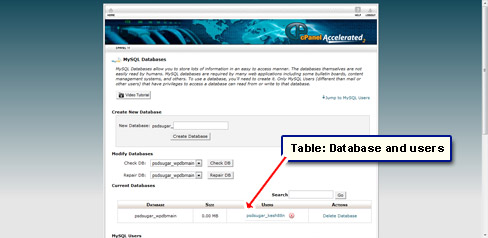
- Go back to the previous screen which will show the database(s) and the user(s) assigned to it in a tabular form [Slide 14].
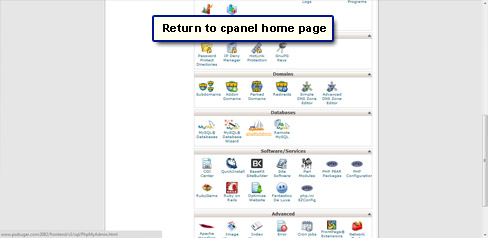
- Click the “Home” icon (top-left) and return to the cpanel main page [Slide 15].
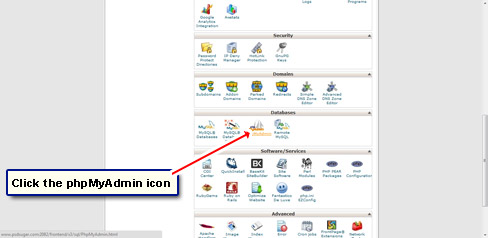
- Fire up phpMyAdmin if you have it in the cpanel [Slide 16]. phpMyAdmin is an online suite of scripts that let you manage the databases. You should be able to go right through without being asked the login details. If not, provide the username and password of the MySQL user account you had set up in slide 8.
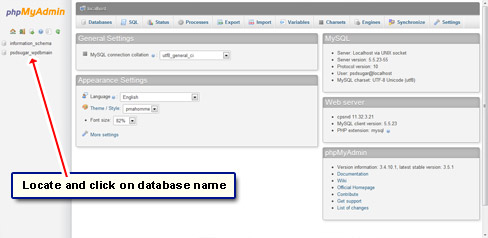
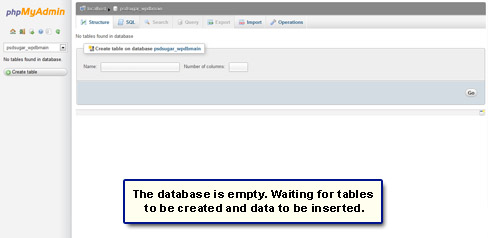
- Once the application loads, you’ll get to see a screen similar to slide 17. I understand that the interface can be quite overwhelming, especially to the newly initiated. As of now, just click on the database name which is shown in the left column.
- phpMyAdmin will tell you that the database is empty. The next step is to create MySQL tables and insert data into them.
You have successfully created a MySQL database on your web site and can log out from the cpanel now.
Why isn’t the user I’ve added able to perform all functions on the MySQL database?
As explained in slides 10-13, one need to assign all privileges to the user. If some of them have not been checked, the user would not have the permission to execute those commands.
For instance, if “Drop” was unchecked, the user would not be able to delete rows, tables and the database as a whole which may or may not be what you want!