In other articles I’ve detailed how to configure Gmail, Yahoo and even Hotmail accounts on the Apple cell phone. In fact, any email account, as long as it’s POP3 (or IMAP) enabled, can be set up on the iPhone. You are required to know just the login details – username and password – and the incoming and outgoing servers.
FYI, the POP email protocol is a technology used to connect and download messages from the email server. It works in conjunction with SMTP (Simple Mail Transfer Protocol) which is responsible for sending out messages.
Sponsored Links
It takes a couple of minutes to set up an email account on the iPhone – just ensure that your mobile phone can connect to the internet. FYI, once email is downloaded to the iPhone, it stays there on the cell phone and can be accessed even without an active net connection; for instance, when you turn the ‘Airplane mode’ on a flight.
Email on iPhone: set up instructions with screenshots
As an example, I will set up my personal email on the iPhone. I know this email account can be accessed with POP because I have configured it in an email program. Again, if you are not sure about this, please do get in touch with your Internet Service Provider (ISP) or the company that has supplied the email account.
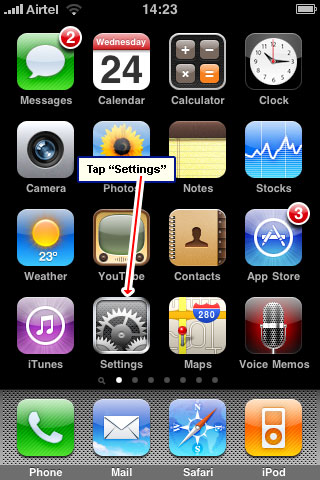
- To set up a new email account on the iPhone tap the “Settings” icon – [Slide 1].
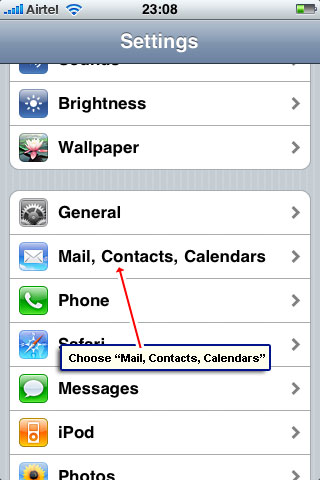
- Scroll down and get to the “Mail, Contacts, Calendars” option – [Slide 2].
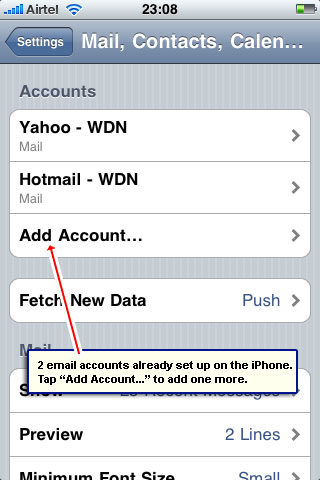
- As you can see from the screenshot, I already have a couple of email accounts added on the iPhone. To configure one more, tap “Add Account…” – [Slide 3].
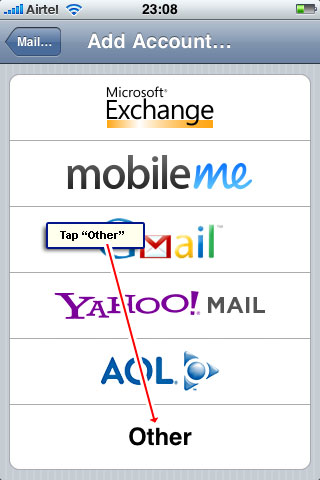
- The next screen displays some popular email services. However, my email account falls in the “Other” category – tap that! [Slide 4].
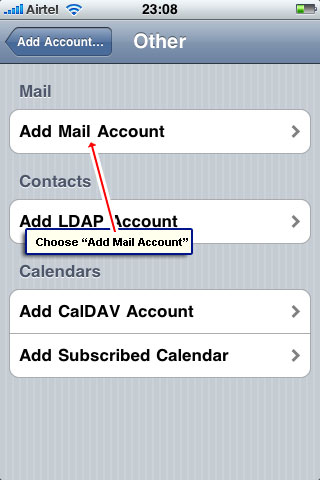
- Now tap “Add Mail Account” – [Slide 5].
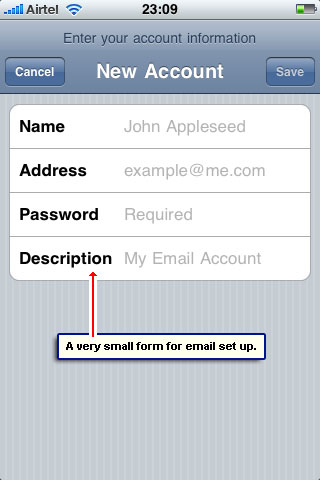
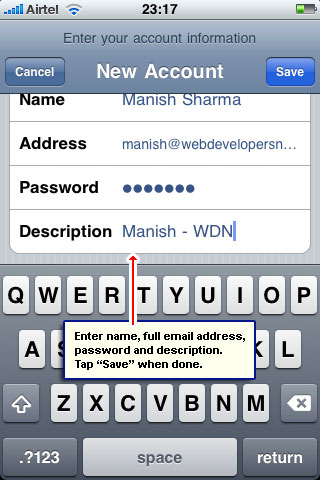
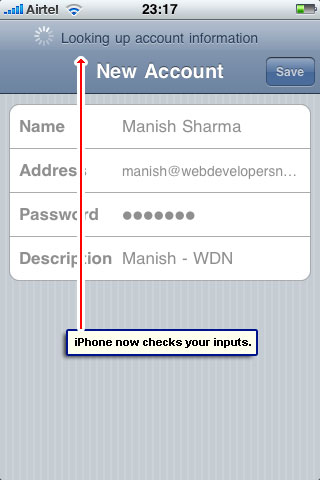
- Fill up the short form by putting your name, complete email address, the account password and a short description in the respective fields – [Slides 6 and 7].
- Tap “Save” when you’ve entered all the required information. The iPhone now checks your inputs – [Slide 8].
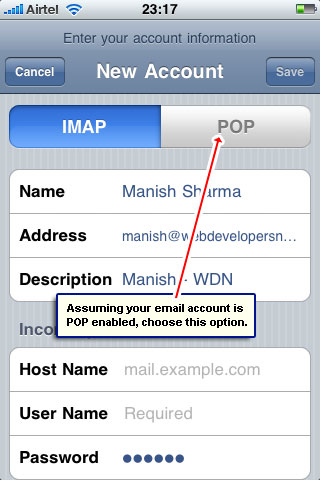
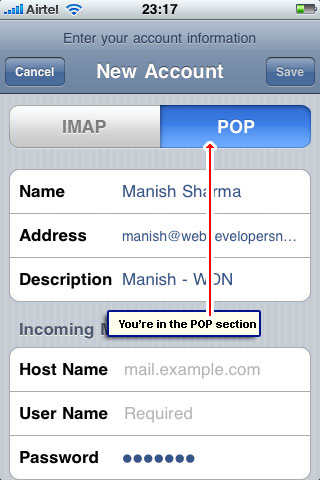
- Assuming yours is a POP enabled email account (refer above), choose that option from the top – [Slides 9 and 10].
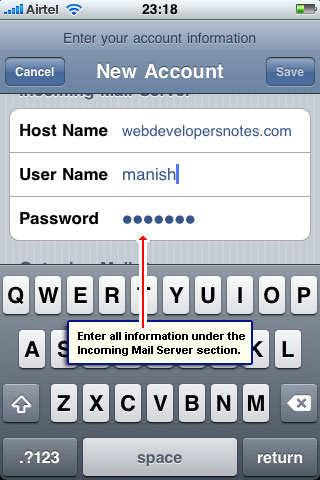
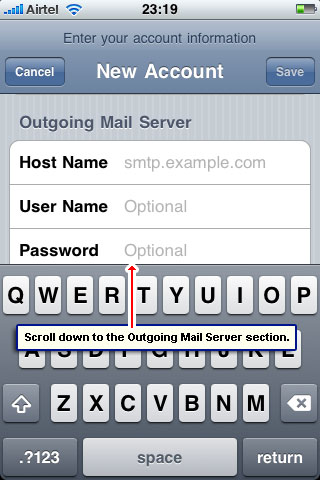
- Scroll down and under Incoming Mail Server enter the “Host Name” , the “User Name” and the “Password” – [Slide 11]. If you do not know the incoming and outgoing email servers for your account, please contact the ISP or refer that link which lists this information for some popular services.
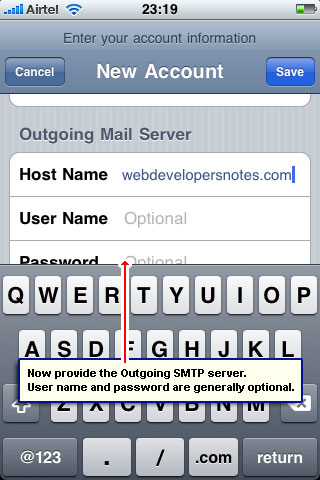
- Also provide the “Outgoing Mail Server” details. Note that the user name and password are optional as not all SMTP servers require authentication. Yours probably doesn’t though it’s best to check with the service provider or ISP – [Slide 12].
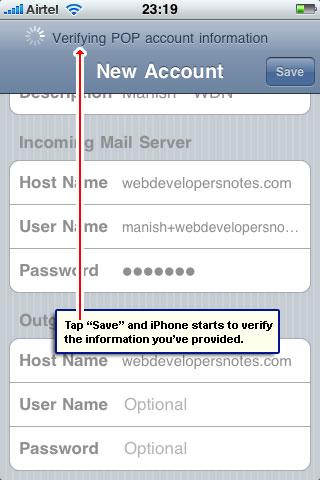
- Tap “Save” and wait for the iPhone to verify all the information you have supplied – [Slides 13 and 14].
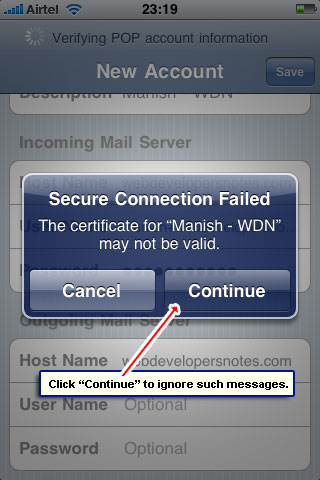
- You may get a message such as one you see in the screenshot. Tap “Continue” – [Slide 15].
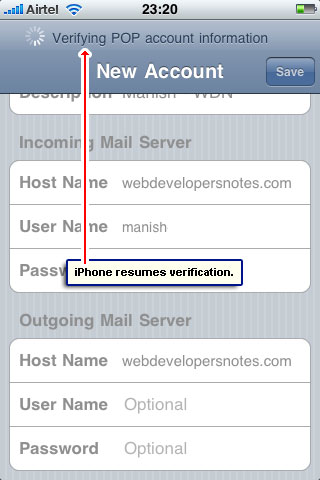
- Your mobile phone will resume the verification process – [Slide 16].
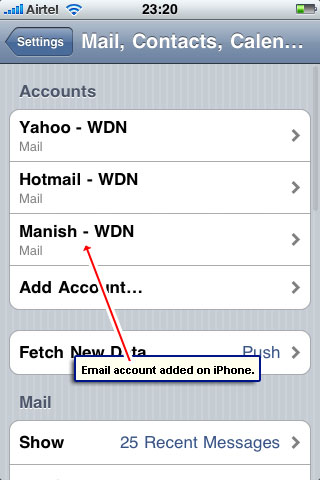
- If everything goes well and you’ve put in the correct username, password and incoming and outgoing servers, the email account will be set up on your iPhone. Congratulations! [Slide 17].
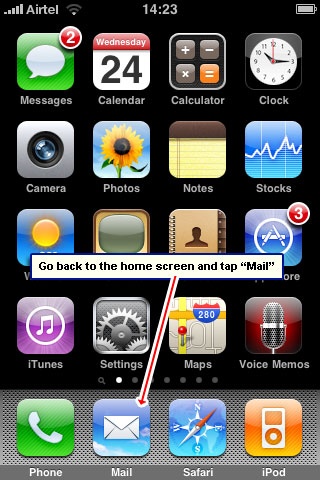
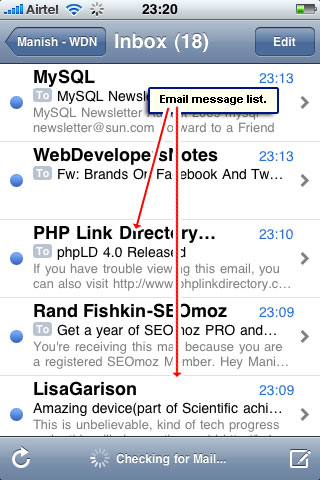
- To access this account, go to the home screen and tap on “Mail” icon – [Slide 18].
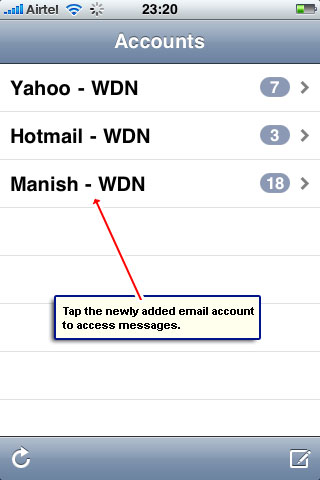
- You’ll find the account listed – [Slide 19].
- The email messages will begin to download on the iPhone when you access the account – [Slide 20].
Conclusion: Any email account that can be accessed via POP or IMAP email protocol can be set up on the iPhone.


Thanks for the tips. Great instructions.
Got my email working. Thanks for the instructions and the screen shots.