As I’ve detailed in other articles, there is actually no way to prevent download and copying of pictures from your web site. Watermarking is probably the best way protect ownership. It typically involves placing a small and / or semi-opaque text or image (like a logo) on the image you want to protect.
So, though there is no way to stop people from copying pictures or photographs from the web, you can deter them by employing watermarks. Now there are several ways to make a watermark and in this article we shall use the free online image editor at Pixlr.com to create one.
Sponsored Links
How to make a watermark in less than 2 minutes
The instructions below are for beginners and will help you make a watermark in a couple of minutes – guaranteed! The only thing I assume is basic computer knowledge. Please refer the screenshots in the slideshow if the need arises.
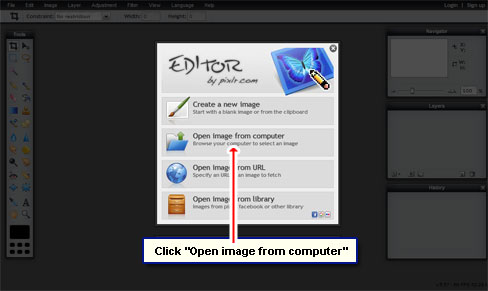
- Open a new browser window/tab and go to the free online image editor, Pixlr.com.
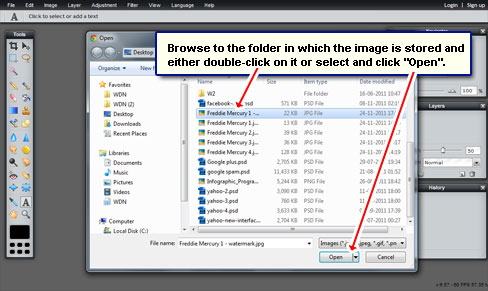
- Click “Open image from computer” and browse to the folder than contains the image on which you want to place the watermark. Select the image and click “Open” [Slides 1 and 2]
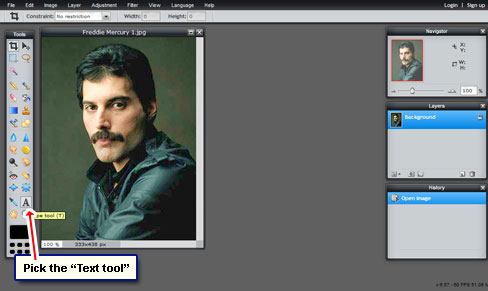
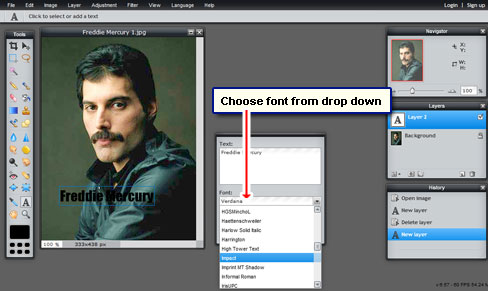
- To create a watermark in the image, pick the “Type Tool” (it’s the one with the uppercase ‘A’). You can also hit the ‘T’ key on the keyboard to select it [Slide 3].
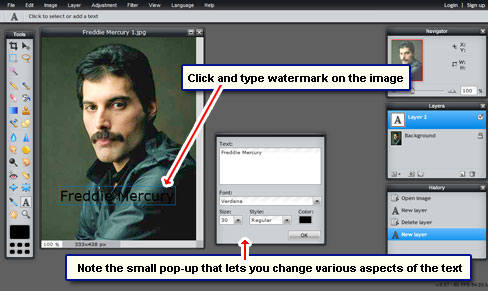
- Click on the image and immediately a small pop-up will be displayed. Type in what you want as the watermark. I suggest © YOUR NAME or © www.yourwebsite.com [Slide 4]. The small pop-up lets you change the various aspects of the text – font, color, size and style.
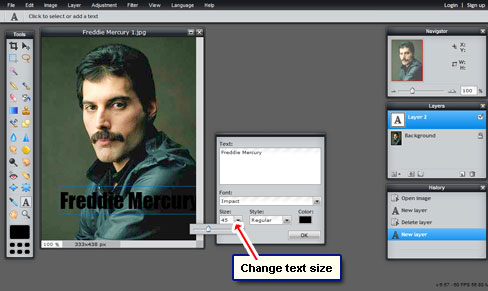
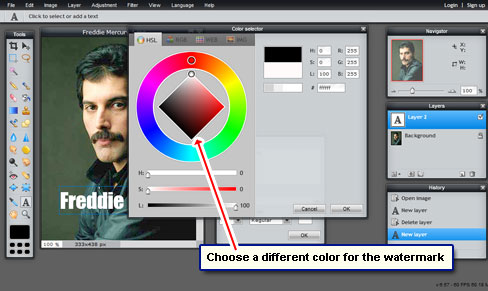
- The text will be displayed in the (default) black color. This will work fine if the color behind the watermark is light. Click the color box to open the color palette and choose one that will make the watermark more prominent. Similarly, you can also change the font and the text size depending on what looks good as a watermark on the image [Slides 5, 6 and 7].
- Position the watermark, if required [Slide 8].
- Come to think of it, you’ve already placed a watermark on the image [Slide 9]. If satisfied, jump to the step on how to save the image else learn how to make the watermark look a little more ‘professional’, if you know what I mean.
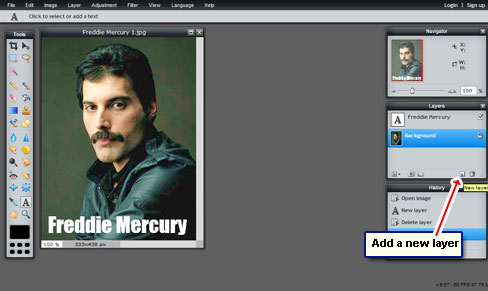
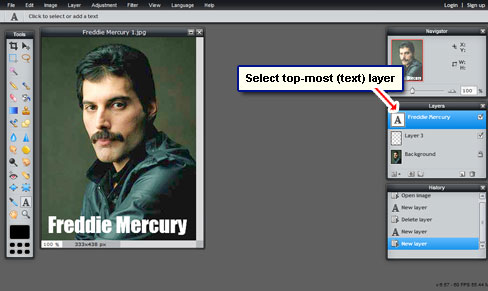
- In the layers panel, select the first layer named “Background” [Slide 10]. Now click the “New layer” icon. The newly added layer will be placed above the first one [Slides 11 and 12]. FYI, layers are like transparent sheets on which you can place any object (text, shapes or other images). They enable you to move, position and resize objects in the image without disturbing others. The eagle-eyed would have noticed that the text watermark is in its own layer.
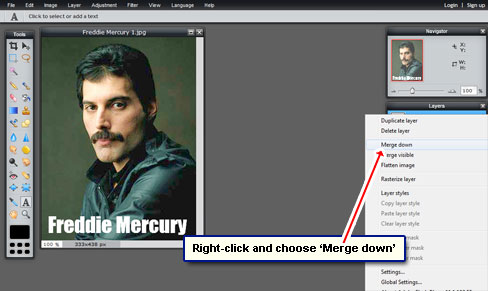
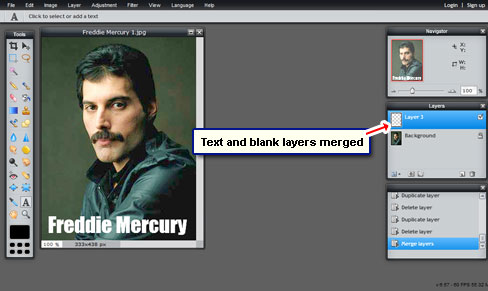
- Click the watermark layer – the one which has the text and is at the very top. Right-click and select “Merge down” from the menu [Slide 13]. The result is the merging of the watermark (text) layer with the (blank) second layer [Slide 14].
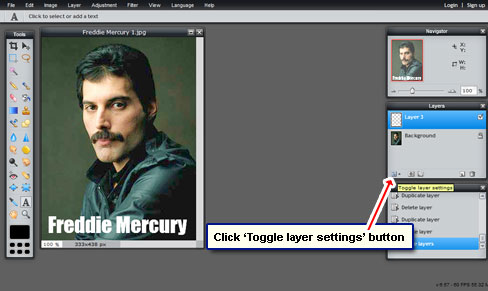
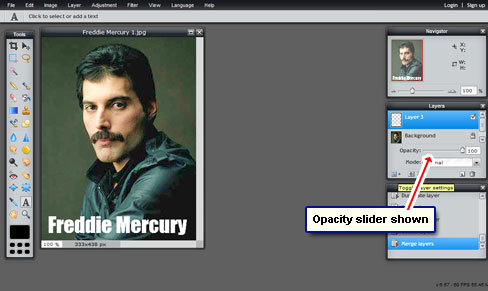
- Click the ‘Toggle layer settings‘ icon to open the opacity slider [Slides 15 and 16].
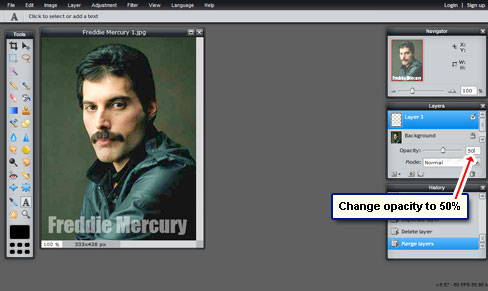
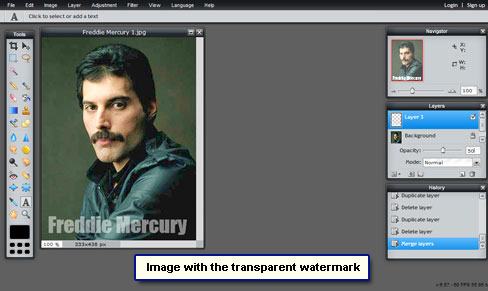
- Change the opacity of the layer by moving the slider or entering a number in the text field. I usually make the opacity 50% which results in a transparent watermark or more correctly, a semi-opaque watermark [Slides 17 and 18].
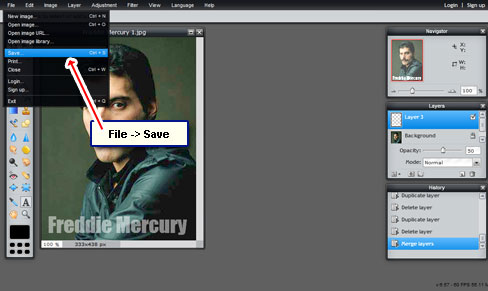
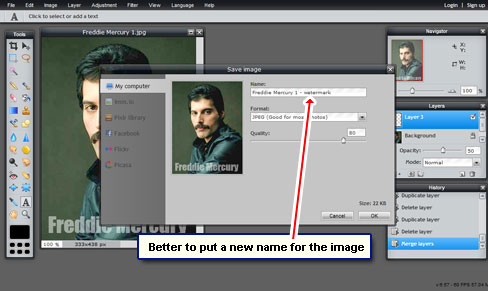
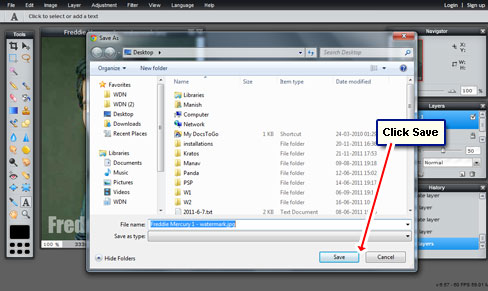
- Time to save the image with the watermark. Pick “Save” from the “File” menu, choose JPG format, provide a file name unless you want the original to be overwritten (not-recommended) and move the “Quality” slider to the level you want [Slides 19, 20 and 21].
- That’s it – you’ve been able to make a watermark successfully. Congrats.
Lastly. for those wondering why I chose a photo of Freddie Mercury for this tutorial – today is his death anniversary! Long live Mr. Fahrenheit.