
What better way to personalise your computer than putting your own photo for your account? On this page I shall provide detailed step by step instructions on how to change the profile picture or the user picture on a Mac. The screenshots below have been worked out on OS X Yosemite.
In addition to the profile picture, there are other ways in which you can personalise your Mac. For instance, you can change the desktop wallpaper, screensaver, color of buttons, login method and much much more. I’ll go through these in other articles.
Sponsored Links
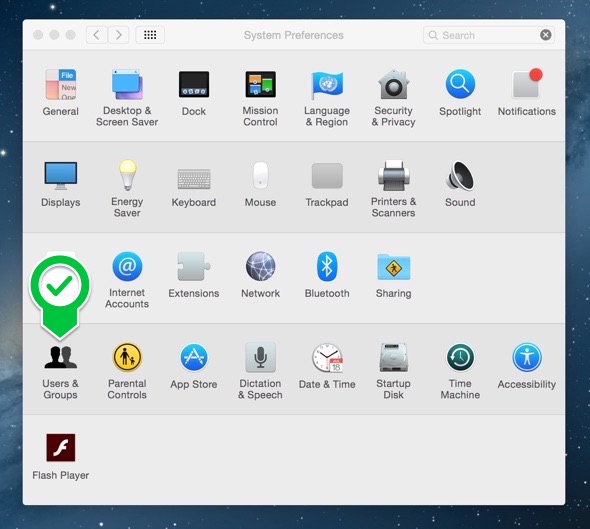
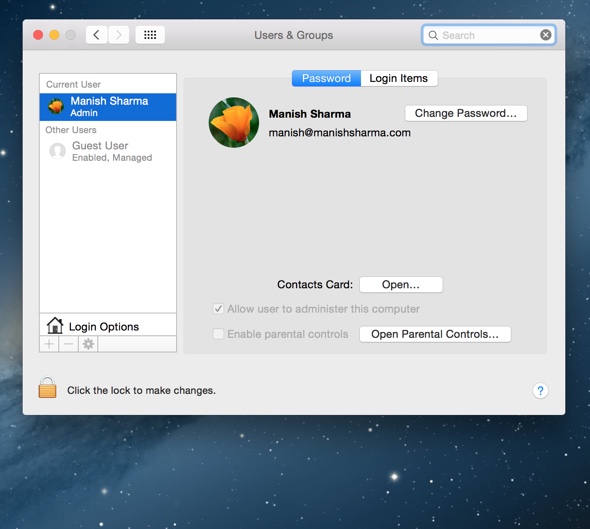
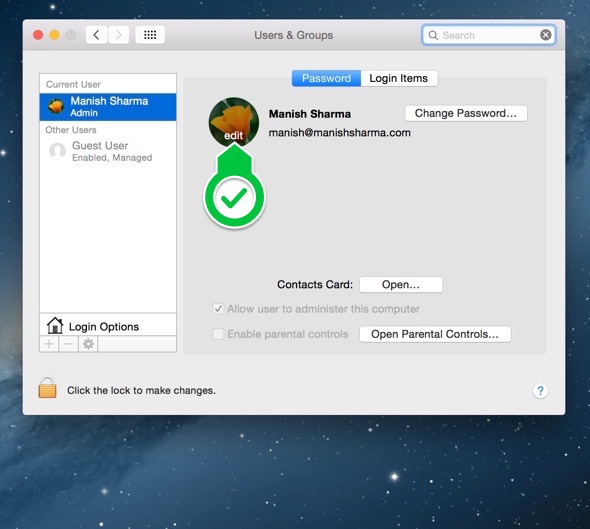
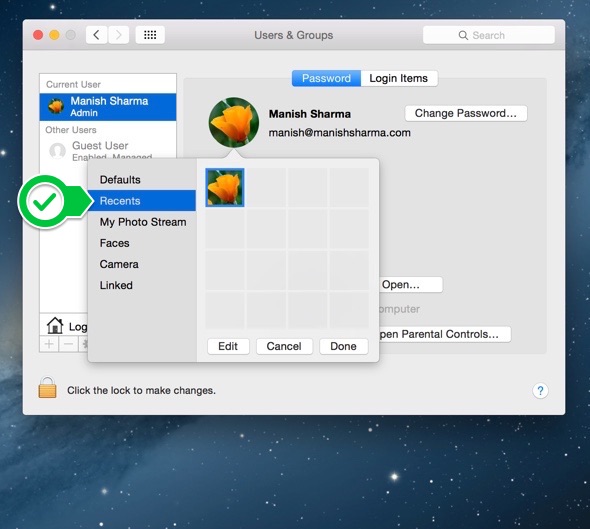
Let us first get to the job at hand and change that default user picture. FYI, the instructions below will work both for the administrator as well as a user.
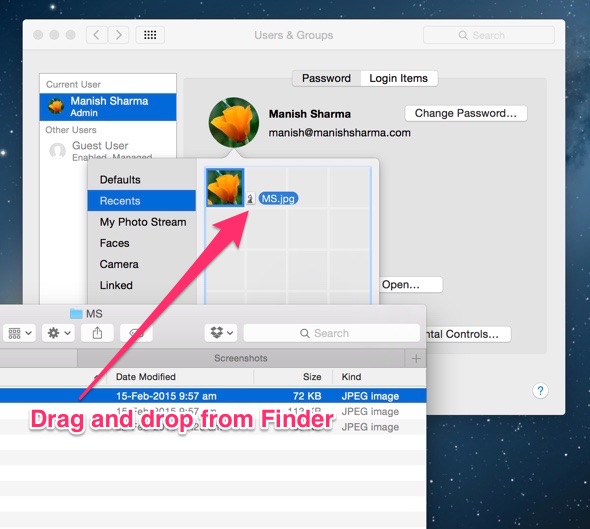
Change the Mac profile picture – Instructions and screenshots

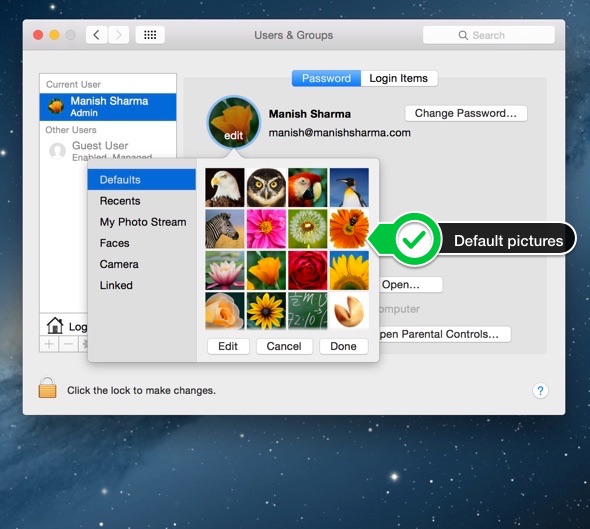
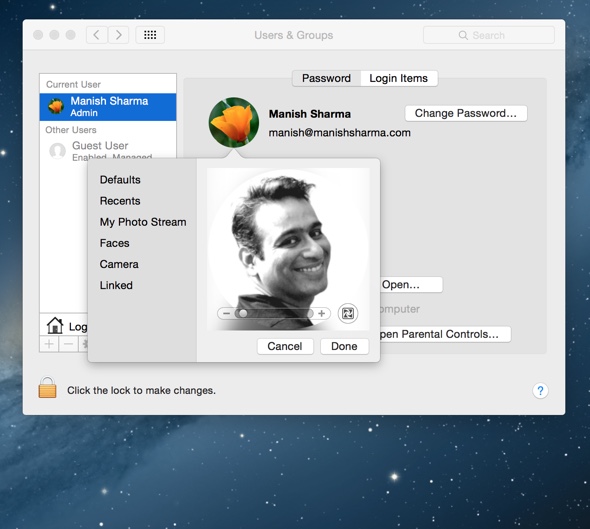
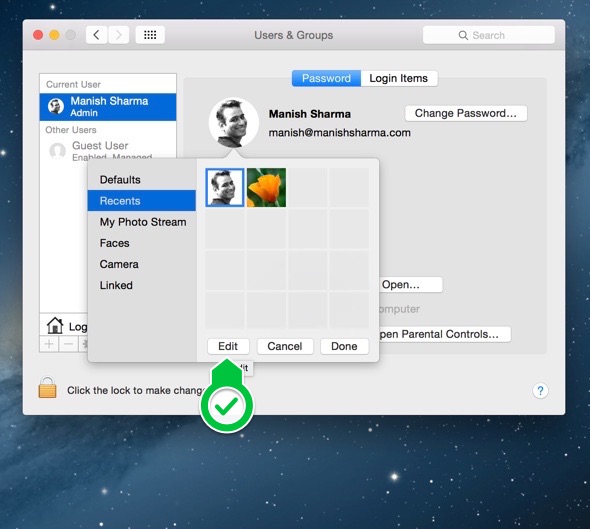
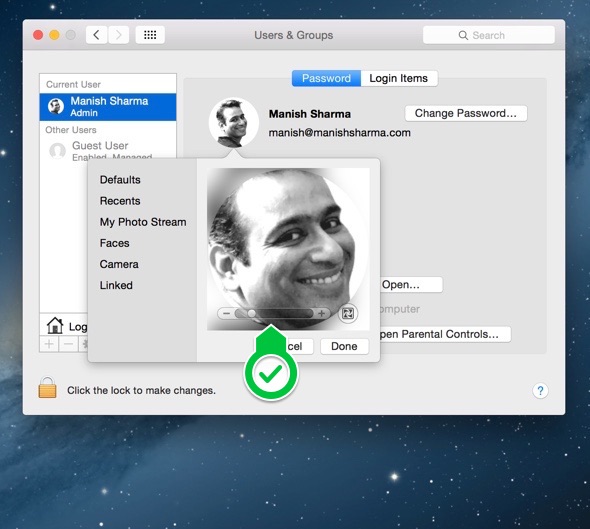

Note #1: You can also edit the picture. Select the picture and click the button – Slide 10 – to bring up a zoom bar. Move the slider in the zoom bar to get to the desired zoom level – Slides 11 and 12.
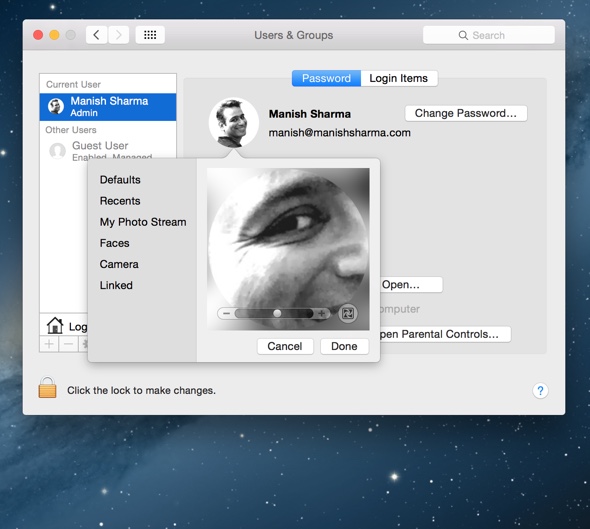
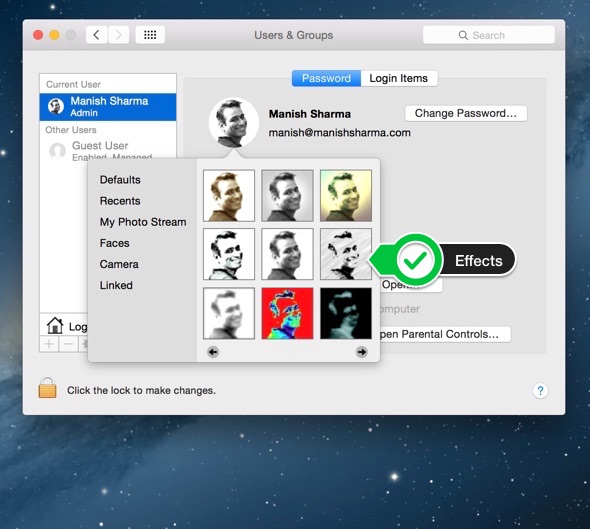
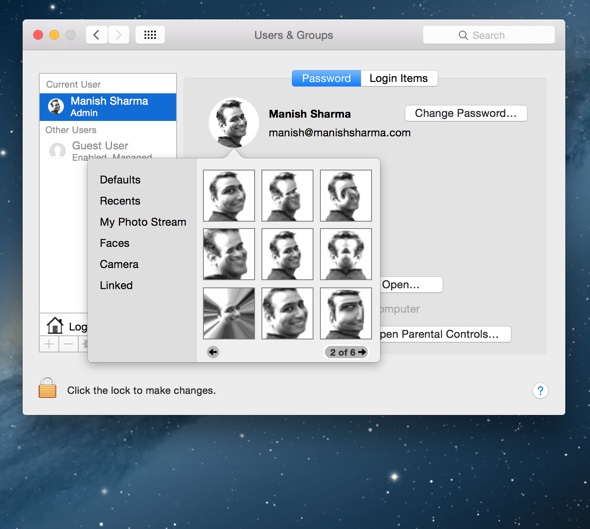
Note #2: In the edit mode, a small effects button also appears – Slide 13. Clicking it will display the chosen picture with various effects applied to it – Slide 14. At the time of writing, there are 32 effects shown across 6 pages. Each page shows only 9 effects; scroll using the arrow keys – Slides 15 and 16.
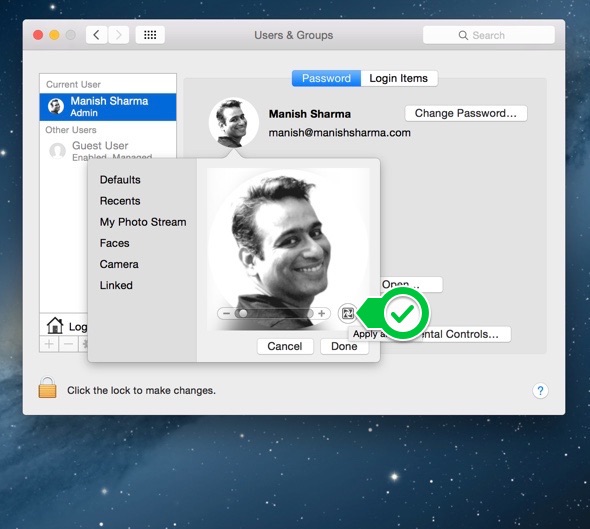
Play around with the zoom and effects feature till you arrive at the result you want. Enjoy!
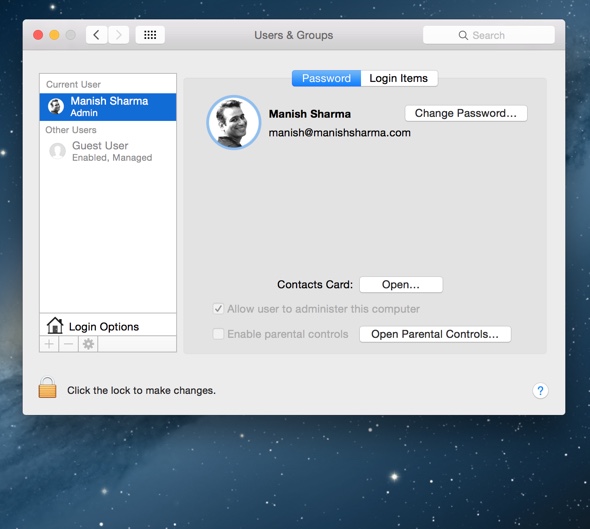
By the way, personalising my new Macbook Pro by replacing the default flower pic with my charming mug shot was one of the first things I did.