Windows Live Mail is the new free email client from Microsoft which replaces Outlook Express on XP and Windows Mail on Vista. Just as in the older programs, you can set up and configure Comcast in Windows Live Mail using the POP email protocol; in fact, the steps are kind of simpler in the new client. This enables you to download Comcast messages and store them on your computer which would be available even without an active net connection.
FYI, we would be using the POP3 (Post Office Protocol) to set up Comcast email account on Windows Live Mail.
Sponsored Links
Step by step instructions to configure Comcast in Windows Live Mail
The POP (Post Office Protocol) email protocol is employed to set up Comcast email in Windows Live Mail. To configure the account, all we need are the login information and the incoming and outgoing mail servers. Please follow the detailed instructions below and refer the screenshot when in doubt.
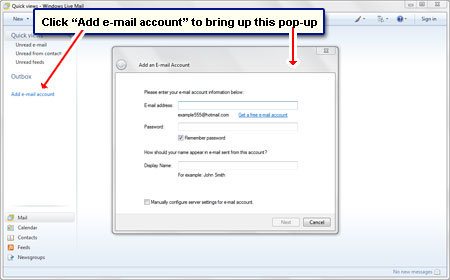
- Launch Windows Live Mail and locate the “Add e-mail account” link; it should be in the left pane [Slide 1].
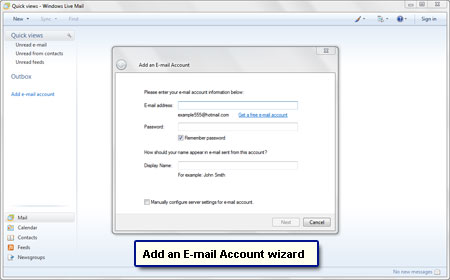
- This opens the wizard that will guide you through the process of setting up Comcast email on Windows Live Mail [Slide 2].
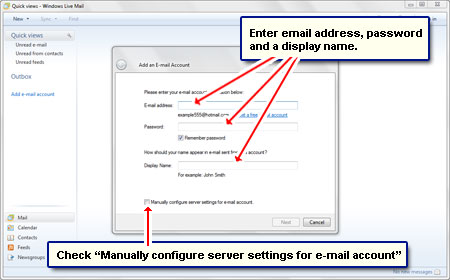
- Enter your full Comcast email address, the account password and a display name in the three blank fields in the first screen. I strongly suggest putting in your real name or that of your business as the “Display Name” since this is what the recipient will see.
Important: Check “Manually configure server settings for e-mail account” option and click the “Next” button [Slide 3].
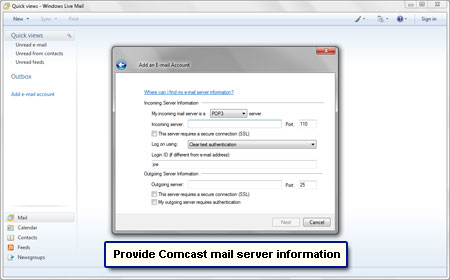
- The following screen [Slide 4] may look daunting… relax! All the information (esp. the Comcast incoming and outgoing mail servers) you need to provide is below:
- Make sure POP3 is selected in the “My incoming mail server is a” drop down.
- Type mail.comcast.net in the “Incoming server” field.
- Put a tick in front of “This server requires a secure connection (SSL)“. This will change the ‘Port:’ to 995 which is fine.
- Enter smtp.comcast.net as the “Outgoing server“.
- Check both “This server requires a secure connection (SSL)” and “My outgoing server requires authentication“.
- Finally, change the port to 587.
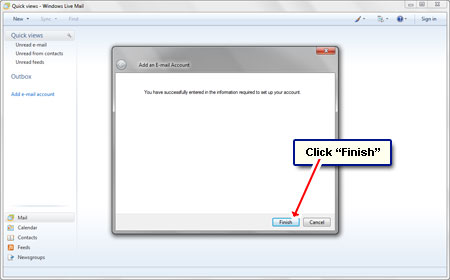
- Click the “Next” button and “Finish” in the last screen [Slide 5].
- Congratulations! You’ve set up a Comcast email account on Windows Live Mail and you’ll find it listed in the left pane.
- However, a small configuration step remains. Right-click on the newly added account and select “Properties“.
- Move to the “Servers” tab and make sure “My server requires authentication” is checked under “Outgoing Mail Server“.
- Click the “Settings” button and ensure “Use same settings as my incoming mail server” option is used.
Note: For people trying to get Comcast email on a new computer (Windows 7 laptop/desktop) , first confirm if you have the Windows Live Mail program. Actually you can use any email client that’s compatible with the operating system; for example, Thunderbird, Outlook. Microsoft, however, recommends installing Windows Live Mail.