
Windows Live Mail is the latest email client from Microsoft and comes as the default email program on Windows 7. FYI, it can be installed on Windows XP and Vista computers too. Even though the program is based on the popular Outlook Express email client (as per Microsoft), message organization and interface of the two are quite different.
To add your BTInternet email account in Windows 7 I recommend using Windows Live Mail – you can actually employ any email client; read the last line in this post. Once the account has been set up on Windows Live Mail, you would be able to download and store email on the local computer. Multiple BT Yahoo accounts can all be added and configured in Windows Live Mail.
Sponsored Links
Note: The new email client does not have the Identities feature found in Outlook Express. To get this functionality and segregate the email accounts, create separate User accounts in Windows 7 and then set up each email account in Windows Live Mail.
Set up BT Yahoo on Windows Live Mail – Windows 7
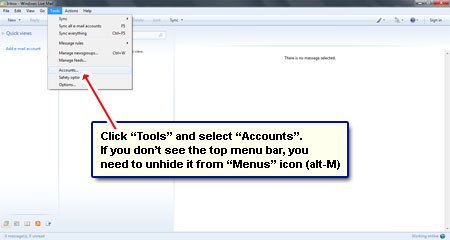
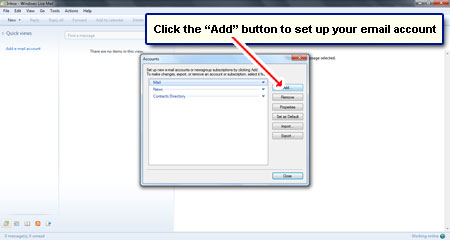
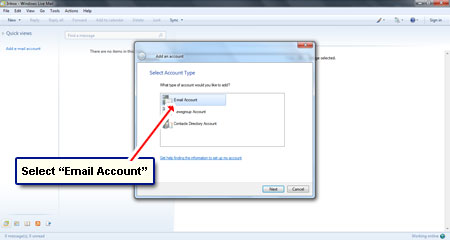
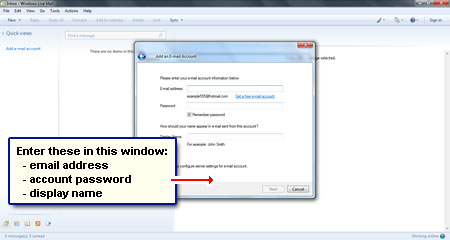
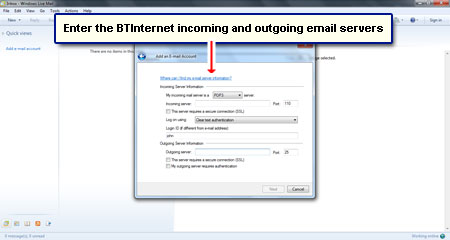
Step by step screenshots are included with the detailed instructions to set up BTInternet email on Windows 7 using Windows Live Mail client– these are presented in the slideshow below.
FYI, you can use another email client on Windows 7 instead of Windows Live Mail. Just make sure it supports the POP email protocol.


I was regretting buying the Windows 7 computer because I thought it didn’t come with an email program. I got it now that to you. Was also able to transfer email from the old computer to the new one.