
For most of us email is a very important part of our day to day lives whether we use it for business or personal communication. Over time our inboxes would end up with vital information the loss of which can lead to a lot of distress.
Hard disk failure or a malicious virus attack can happen to anyone. It’s imperative to safeguard our peace of mind by keeping a copy of the email in an external storage device. And this is what I shall detail in this article – how to create a backup of Windows Live Mail email messages.
Sponsored Links
What is Windows Live Mail?
Windows Live mail is a new email program from Microsoft. It may come preloaded with your Windows 7 computer. If not, Windows Live Mail can be downloaded and installed for free. In fact, you can also get it for your old XP and Vista computers.
Just like Outlook Express on Windows XP and Windows Mail on Vista, Windows Live Mail lets you download and store email on your computer. This involves setting up account in the email program, a process that can be completed in a couple of minutes. Anyway, once the messages are transferred to the local computer, they are available even without an active net connection. And more importantly, a backup of the Windows Live Mail email can now be created!
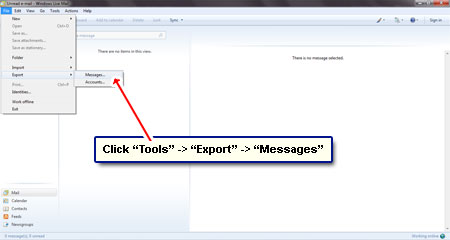
How to backup Windows Live Mail – instructions and screenshots
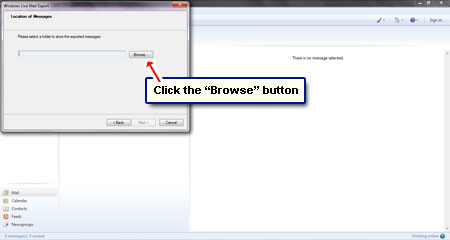
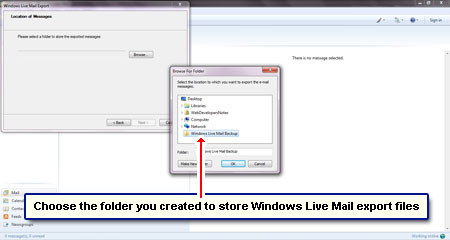
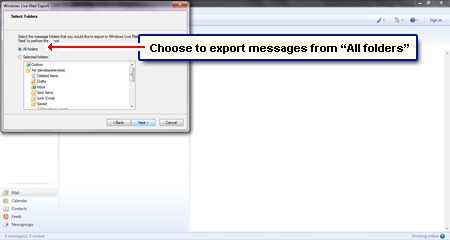
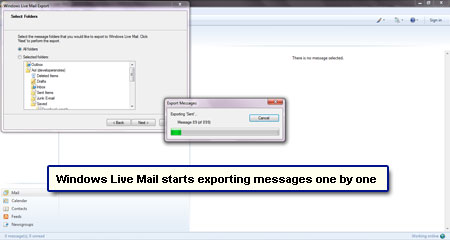
We’ll use the export function of the email program to first copy messages from the program to a different location (folder). You can then create a backup of Windows Live Mail email by moving this folder to an external storage device such as a hard disk or a flash drive.

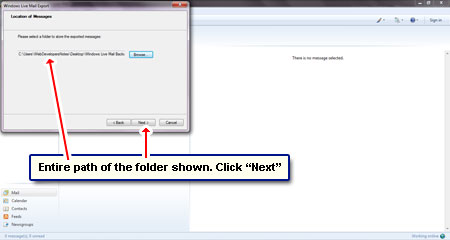
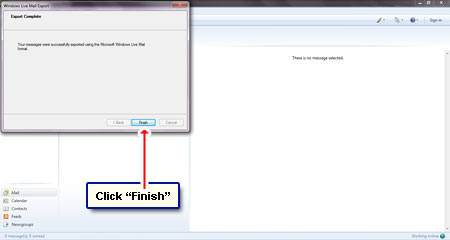
Now that the messages have been exported you can take a backup of the Windows Live Mail email folder by simply using the copy (or cut) function to move it to an external storage device!