How do I deduce image size for email and web?

How do I deduce image size for email and web? cover image
  1. Home
  2. Email
  3. How do I deduce image size for email and web?

Have recipients complained about the huge photographs they received from you over email? Are you uploading large images on your web site or blog which take forever to download? Here is your chance to learn how to reduce the image size using a free online graphics program.

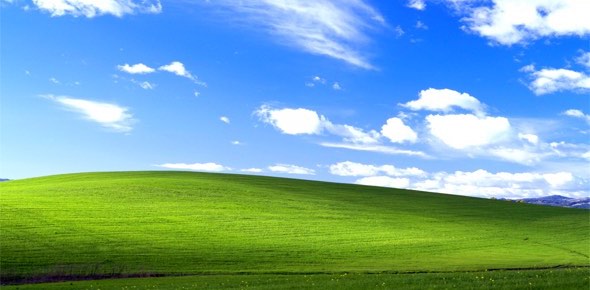
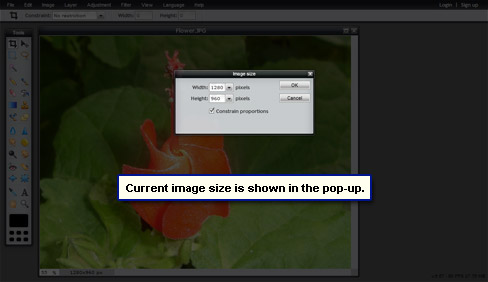
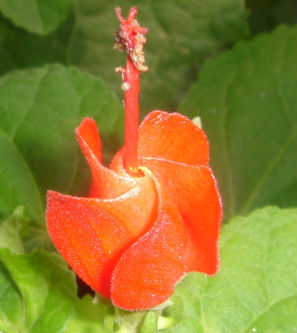
This quick introduction to image editors should prove a stepping stone for budding web developers into exploring such software in greater detail. Our sample image is a photo I took using my digital camera. It’s 1280×960 pixels in dimensions with a file size of 271kb, which, as you can understand, is way too huge for email or use on a web site/blog. We have to reduce the image size

Sponsored Links

We would be reducing t=the width and height as well as the file size. FYI, unless your digital camera has a “For web” or equivalent function, photos that you take with the device will be quite large in both file size and physical dimensions.

Optimal image size for the web?

So what should be the optimal size of an image which is to be sent over email or used on a web site / blog?
Unfortunately, there are no hard-and-fast rules. It all depends on the purpose for which you are using the image.

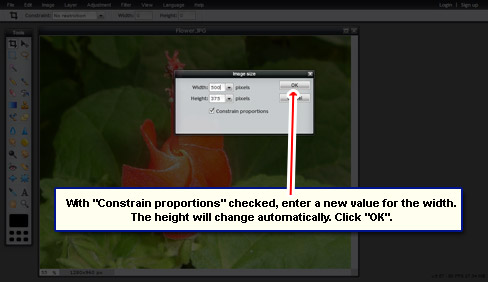
For instance, when emailing photos taken from a digital camera, you should seriously consider reducing the size of images to something between 400-600 pixels (in width). This will allow you to send a lot more images with one email message. Also recipients who use programs such as Outlook Express or Outlook would not have to scroll (vertically or horizontally) to view the image because the smaller version will be displayed in one screen pane. However, if you are sending the image to be printed off by the recipient, I suggest providing them with the original unreduced sized photo.

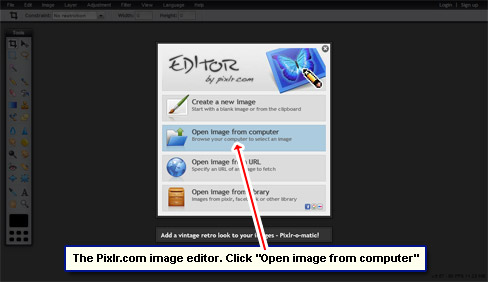
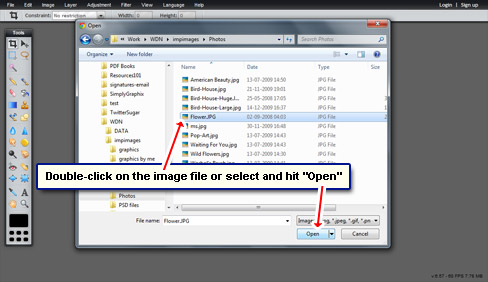
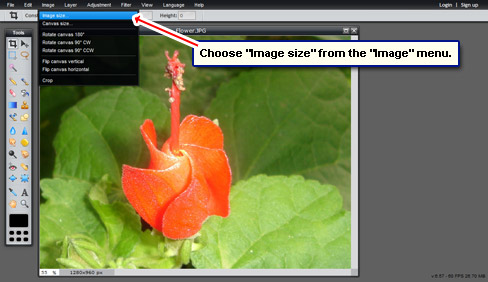
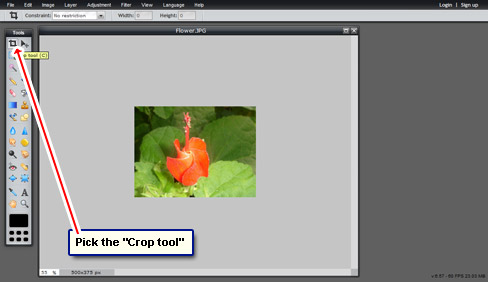
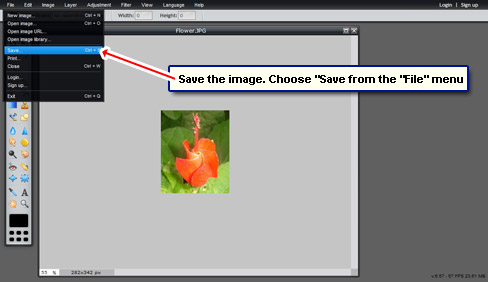
Reduce the image size using the free Pixlr.com image editor

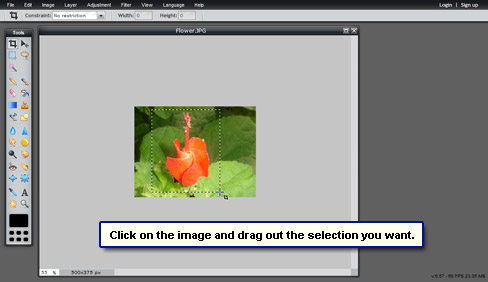
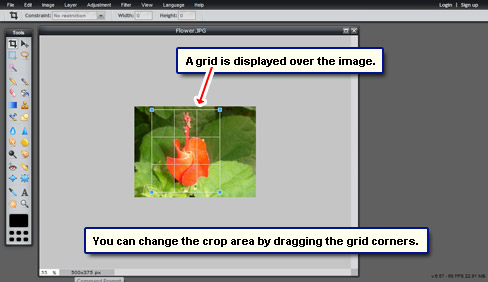
The step by step instructions with screenshots are in the slideshow.

  • Open image in the online Pixlr graphic editor
  • Select and upload image from a folder on your computer
  • Pixlr opens the image and displays it
  • Use the image size option in the online editor
  • Get the current image size
  • Enter a smaller size for width and height
  • Image dimensions reduced
  • Pick the crop tool to further extract only the required area
  • Select and drag the cursor over the image
  • A grid appears over the image. You can change the crop area by dragging the corners of this grid.
  • Crop out only the important part of the image
  • Image size in both dimensions and filesize will reduce by cropping
  • Save the final image back to your computer
  • Remember to save photos in jpg format
  1. Open the Pixlr.com image editor in a browser window.
  2. Click “Open image from computer” and browse to the folder on your computer that has the image. Double-click on the image file or select it and hit “Open” [Slides 1 and 2].
  3. Your chosen image will now be opened in the Pixlr image editor [Slide 3]. The number at the bottom-left shows the image display size in percentage.
  4. Pick “Image size” from the “Image” menu [Slide 4].
  5. The program displays the current image size which is 1280 pixels (width) and 960 pixels (height) [Slide 5].
  6. Make sure the “Constrain proportions” box is checked else you’ll distort the image. Now enter a new value in the width field – say, 500 pixels. The height will be adjusted automatically. Click “OK“. If you are not happy with the result, you can always go back to the previous step with the “Undo” function (under the “Edit” menu) or use the Ctrl-Z key combination [Slide 6].
  7. If you had supplied a smaller value for width or height the image dimensions will be reduced. You can go ahead and save the image but let me tell you how to get the size down further [Slide 7].
  8. There are times when you are interested in only a part of the image – the rest is superfluous and can be removed. The best way to do this it to crop out the section you want and for this we will use the Crop tool (what else?) [Slide 8].
  9. Select the Crop tool icon; move the mouse cursor on the image and click-drag-release to mark out the image section you want [Slide 9].
  10. You will get a grid over the image which denotes the area that will be cropped out. You can expand or reduce this grid by clicking and dragging the small squares at the four corners [Slide 10].
  11. Click outside of the grid to get a pop-up that asks for your confirmation to proceed with the cropping process. Hit “Yes” if satisfied with the crop area else click “Cancel” and change the selection [Slide 11].
  12. The image is cropped with only the important section [Slide 12].
  13. The last step is to save the image. Go to the “File” menu and choose the “Save” option. For photographs, I suggest saving the reduced image as a JPG. Provide a file name and move the quality slider as per requirements [Slides 13 and 14].

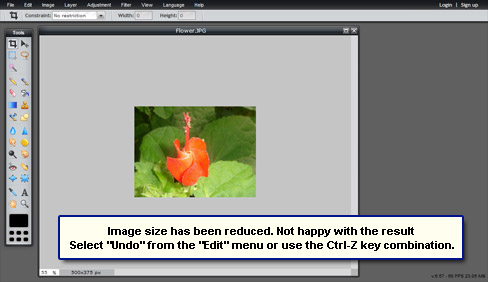
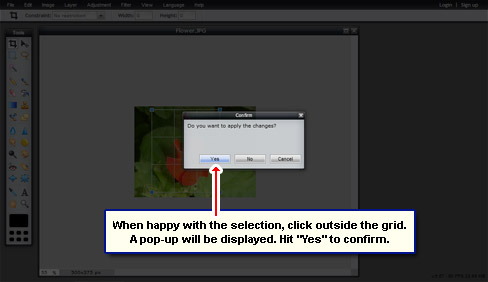
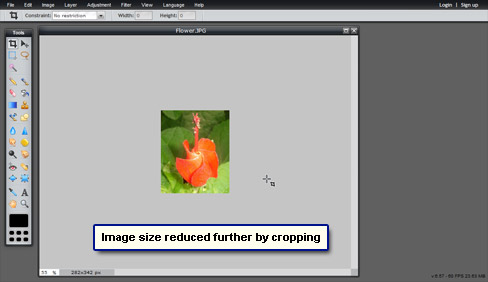
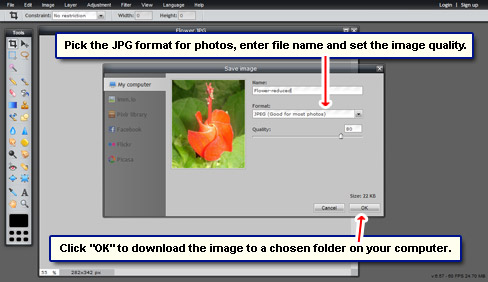
What was the result? We took a 1280×960 pixels 271kb image and decreased both the dimensions and the file size. The reduced image (below) is 297×333 pixels and 22.2kb in size.

Photograph from a digital camera. Image size reduced, both dimensions and file size, using the online image editor pixlr.com

Finally, those who want to know more, I suggest reading how to optimize JPG images and optimizing gif files. The article on how to make photographs smaller for email may also interest you.

Email Graphics How Do I Images & photos