PHP is a server-side scripting language and, at the time of writing, the world’s most used web computer language. Additionally, some of the most popular web-suites like the WordPress and Joomla content management software, have been written in PHP.
The language was created by Rasmus Lerdorf in 1995 for his personal web site and, probably for this reason, was called originally Personal Home Page. PHP soon became popular and other developers started chipping in. Its name was later changed to a recursive acronym, PHP: HyperText Preprocessor.
Sponsored Links
We believe PHP is a simple language to learn. A few months of dedicated practice and you would be able to create fairly decent applications for web sites. The strong point of PHP is that it can easily connect to databases such as MySQL that help you to develop dynamic pages.
In this article, we would be providing detailed instructions on how to install PHP on a Windows 10 computer. This way you can set up a local web development environment and avoid the expenses of an actual web host.
But PHP doesn’t run on its own. It needs a web server such as Apache. So before you start on this guide, make sure you have installed Apache on your Windows 10 computer – click on that link to check out that guide.
Once the Apache web server is set up and configured on Windows 10, come back to this page and set up PHP. The process is quite easy!
If you have Apache running, dig right in.
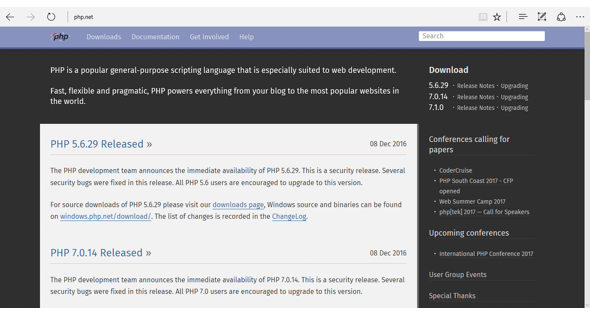
- Launch a web browser and go to PHP.net. Click the “Downloads” tab on the page – its at the top [Slide 1].
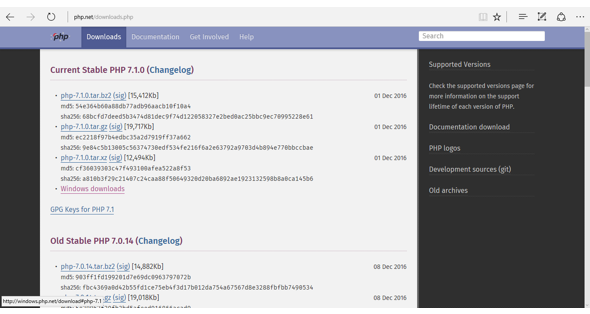
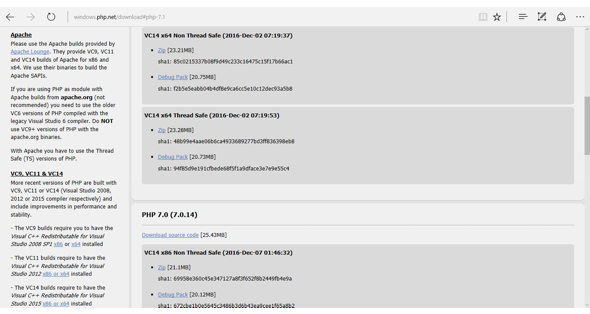
- The current stable release is PHP 7.1.0 and this is what we would be installing on the Windows 10 computer. Click the “Windows downloads” link [Slide 2].
- Choose the VC14 x64 Thread Safe zip file on the next page [Slide 3].
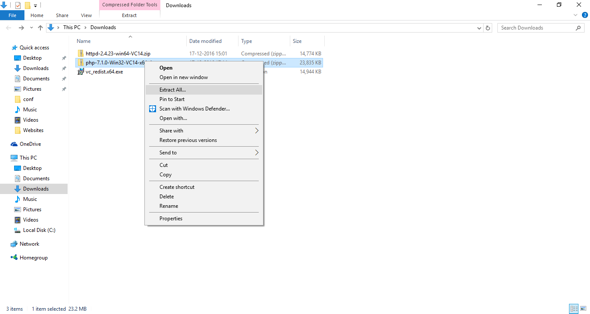
- The file will be downloaded to the default downloads folder. Move to the folder when the download completes, right-click on the file and select the “Extract All…” option [Slide 4].
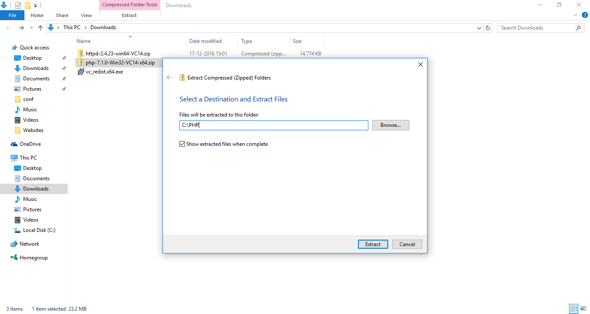
- This opens a pop-up with the default directory to which the archive would be unzipped to. We like to keep things simple on our computer and would recommend you do the same. Thus, we recommend installing PHP in its own directory on the C: drive.
Replace the default directory to C:\PHP and hit the Extract button [Slide 5].
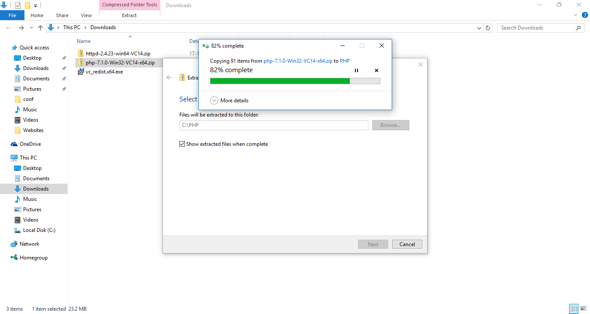
Files from the PHP zip archive would begin to get extracted to the specified folder [Slide 6].
- The next step is to configure PHP on the Windows 10 computer.
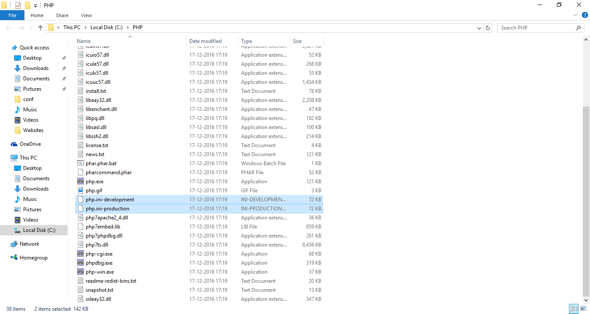
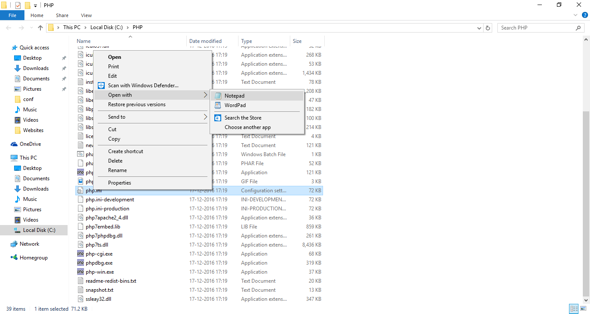
Move to the folder to which the PHP files were extracted and locate the ini files; there would be two of them – php.ini-development and php.ini-production [Slide 7].
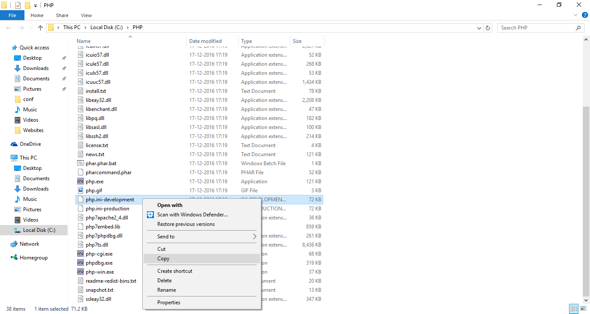
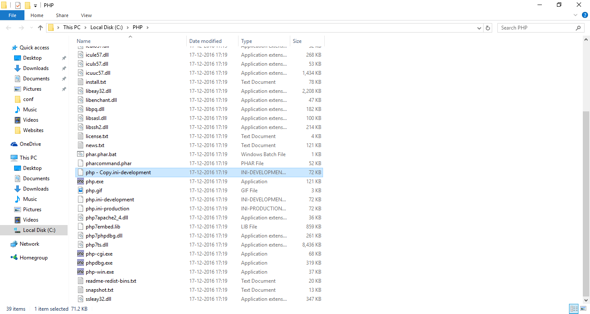
- Right-click on php.ini-development, select “Copy” option from the menu to create a duplicate of the file [Slide 8]. This way, if we mess up, we’ve at least preserved a copy of the original. Right-click on a black area and select the “Paste” option to get a copy of the file [Slide 9].
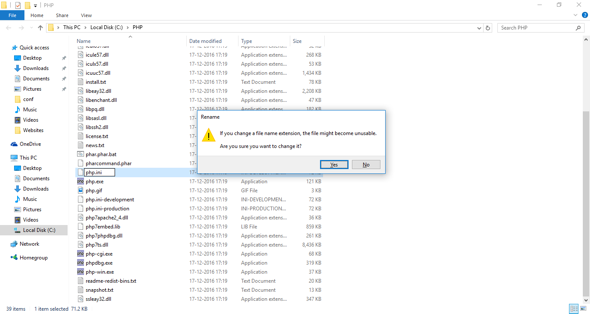
- Rename this copy to simply php.ini. Since we are changing the file extension, the system would throw up a warning asking for a confirmation [Slide 10]. Click the Yes button. FYI, once the file name is modified, the file icon would also change.
- Right-click on the php.ini file and select “Open with” -> “Notepad” option [Slide 11].
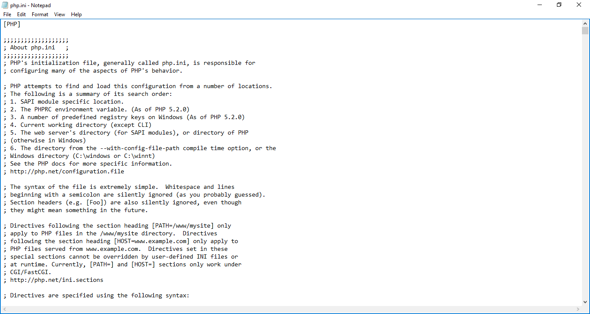
- We now get to see what the php.ini file looks like – it’s essentially plain text. For PHP to run on our Windows 10 computer without any issues, we need to make a few modifications.
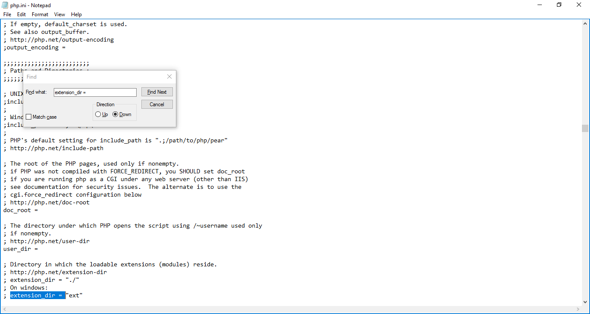
- Using the “Find” feature (keyboard shortcut Ctrl + F) hunt for extension_dir = . You should come to a line similar to what is shown in Slide 13.
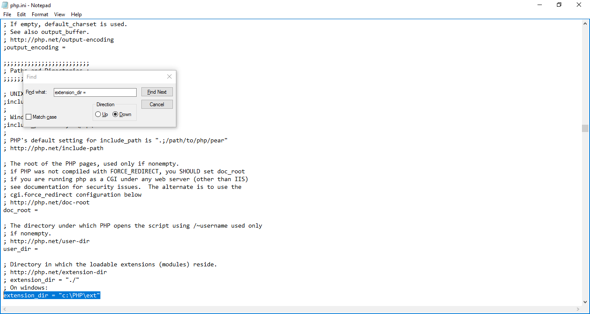
We need to change this to:
extension_dir = "c:\PHP\ext"
Thus, remove the prefix semicolon and set the directory path to c:\PHP\ext. FYI, this points to the ext folder inside the directory in which we installed PHP – c:\PHP.
Refer Slide 14 in case of any doubt.
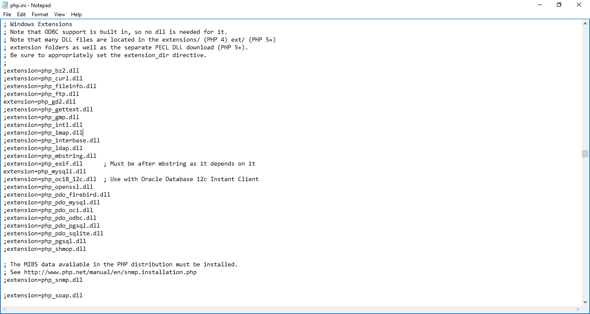
- Employ the “Find” feature once again to locate the “Windows Extensions” section in the php.ini file. You’ll find a list of extensions that should be loaded by PHP for it to work with other applications such as MySQL database [Slide 15].
- Remove the semicolon before the GD library and MySQL extensions. The two lines should look like ones below (refer Slide 15 again):
extension=php_gd2.dll
...
extension=php_mysqli.dll
You can remove the semicolon (or uncomment) other lines to enable those extensions to load.
- FYI, the default upload file size of this PHP installation is 2MB. If you feel that you may need to increase this value, hunt for “upload_max_filesize = ” line and change it as per requirements.
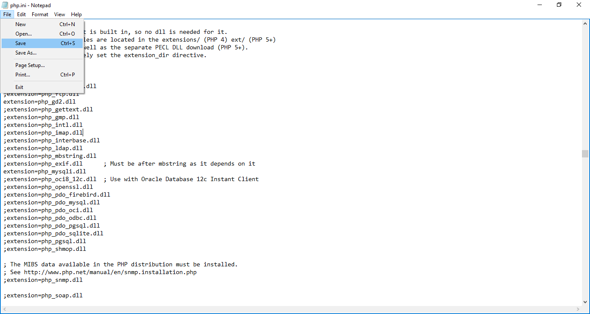
- Save the php.ini file [Slide 16] and close the Notepad app.
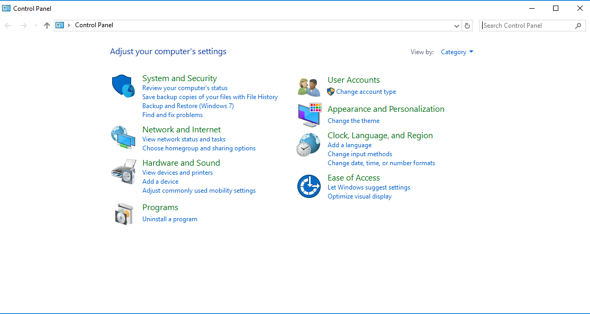
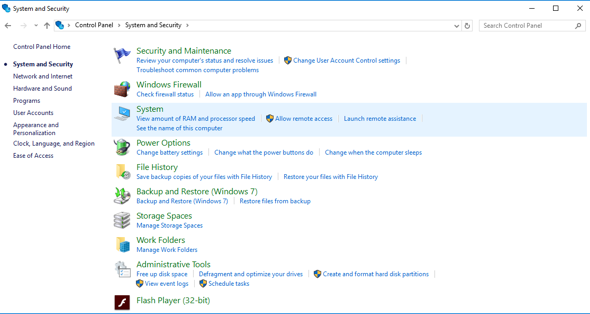
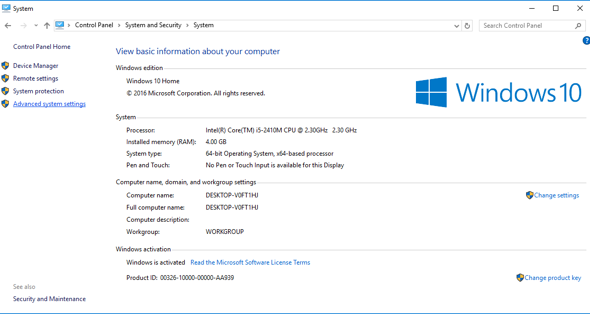
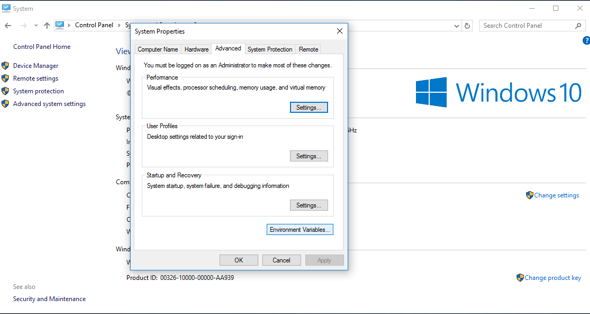
- We now need to set the environment variable for PHP. Open the Control Panel. Go to System and Security [Slide 17] -> System [Slide 18] -> Advanced system settings [Slide 19].
- Click the Environment Variables button [Slide 20].
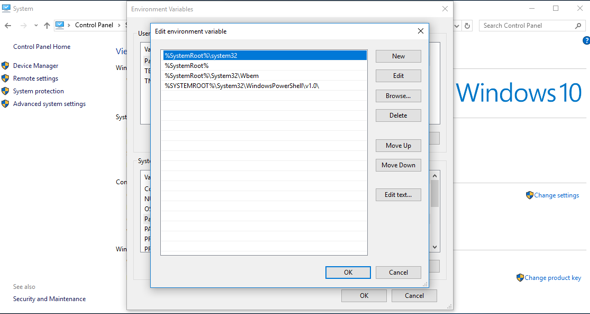
- Select “Path” from the “System variables” section and click the Edit button [Slide 21].
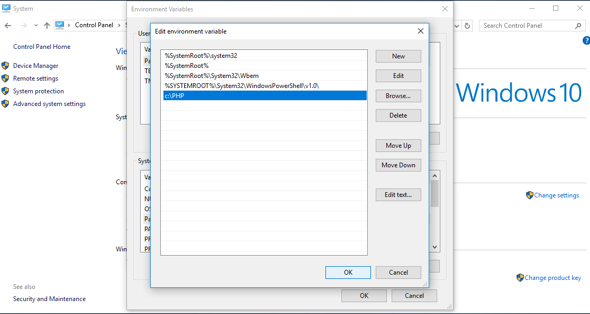
- A pop-up window will appear [Slide 22]. Click the New button and add c:\PHP as the new variable as shown in Slide 23.
- Click OK button [Slide 24] on this pop-up and all the others to close everything.
- As mentioned before, for PHP to work we need a web server like Apache. Assuming you had set up and configured Apache on your Windows 10 computer, open the server’s configuration file httpd.conf in Notepad. It should be residing in c:/Apache24/conf folder if you’ve used our instructions.
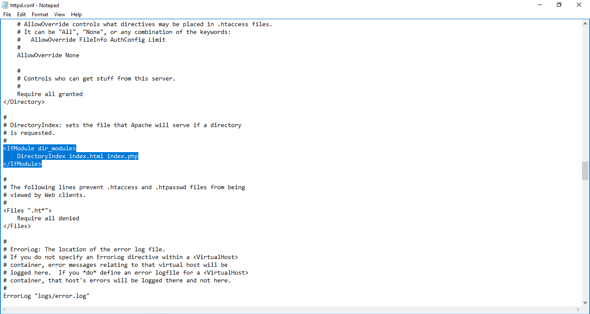
- Move to the DirectoryIndex line and add index.php with a preceding space character. The lines should look like:
<IfModule dir_module>
	DirectoryIndex index.html index.php
</IfModule>
Refer Slide 25 in case of doubt.
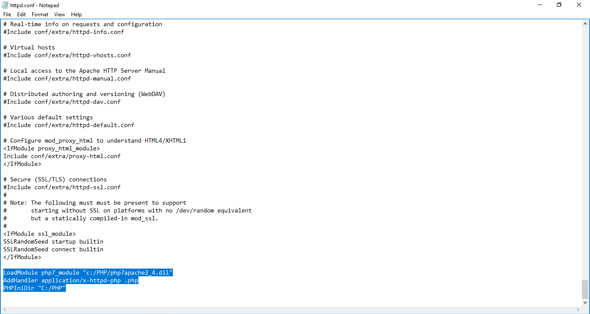
- Move to the very end of the httpd.conf file and add the following three lines:
LoadModule php7_module "c:/PHP/php7apache2_4.dll"
AddHandler application/x-httpd-php .php
PHPIniDir "c:/PHP"
I’ve marked these lines in blue in Slide 26.
- Save the file.
- Since we have changed the PATH variable a restart of the computer is typically required.
Testing the PHP installation on your Windows 10 computer
Go to the document root folder. It should be c:/websites if you’ve followed our guide on installing Apache on Windows 10.
Launch the Notepad application and put in the following three lines:
<?php
phpinfo();
?>
Save this file as phpinfo.php.
Make sure the extension is .php and not .txt or .html.
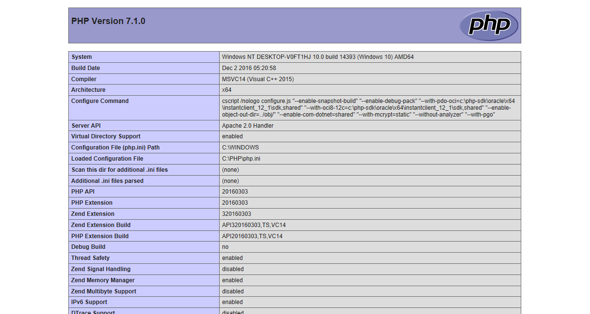
Launch your chosen web browser and type in localhost/phpinfo.php in the address bar.
You should get a page similar to Slide 27.
Hurray! Your PHP installation was successful.
Here is a “Hackerman meme” for you!
We’re sure you’ll be pleased and pumped up after installing PHP. Why don’t you start on our guide on how to install MySQL which will complete the local web development environment on your Windows 10 computer.


Thank you very much. As someone who writes a lot of “user guides” I’m very impressed with this as with your efforts in the past. One small point: I found the pics needed a lot of magnification to be readable. I don’t think it’s all to do with my advancing years…