
Installing PHP on Windows 7 is quite a simple affair. If you follow the steps exactly as described in this tutorial you will have PHP up and running without any problems. However, as experienced developers know, you first need to have a web server running on the system. Here are instructions on how to install Apache on Windows 7 operating system – the world’s most popular web server.
Also, if you are a budding PHP programmer, you would soon like to use it with MySQL database. So once you are through with this page, check out the detailed step by step instructions on how to install MySQL on Windows 7.
Sponsored Links
Which PHP download file should you use?
The aim of this tutorial is to set up PHP so that you can learn the language and start developing web applications. PHP is available for download in many forms. There are the Thread Safe and Non Thread Safe versions and each comes as a zip, installer and debug pack.
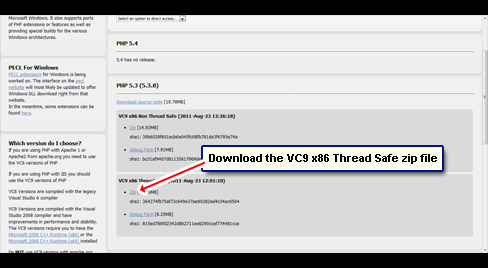
To make things simple we shall install PHP from the zip archive. Point your browser to the ‘Windows binaries and sources Releases’ page or click this link – http://windows.php.net/download/. Scroll down a little and locate the VC9 x86 Thread Safe section and download the zip file [Slide 1].

Create a folder to install PHP
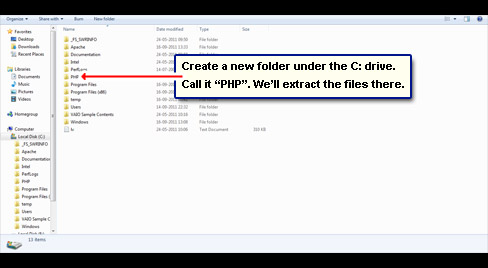
The first thing is creating a folder to which we would extract the PHP files from the zip archive. Since I like to keep things segregated and yet accessible, I’ll be installing PHP in its own directory under the C: drive and recommend you do the same. So go ahead and create a folder called PHP on the C drive [Slide 2].
Move to the folder in which you have downloaded the PHP zip file and double-click on it to reveal its contents. Select and copy all the files in the archive (Tip: use the Ctrl-A and Ctrl-C keyboard shortcuts). Now paste all the files (Ctrl-V) in the empty C:\PHP folder.
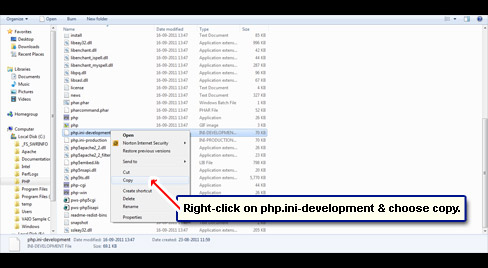
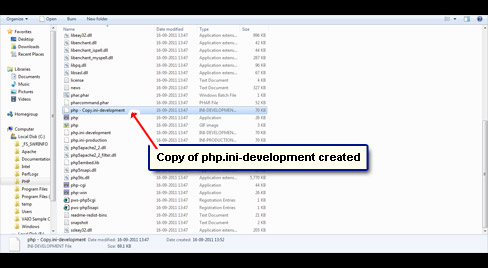
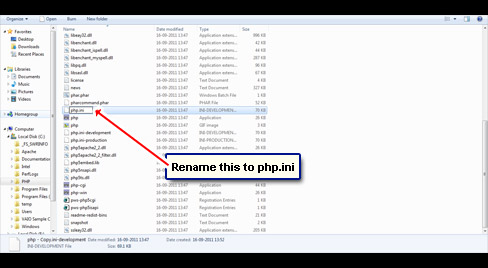
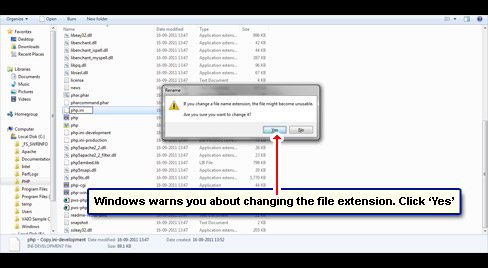
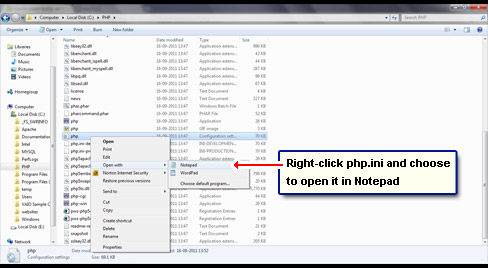
You’ll see a file called php.ini-development. Right-click on this file and choose Copy – [Slide 3]. Now paste the file in the same directory – [Slides 4 and 5]. Rename this file to php.ini [Slide 6]. Windows will tell you that changing the extension will make it unusable – answer ‘Yes’ [Slide 7].
Note #1: Your computer might not display the file extensions, in which case I suggest you read how to get the file extension on Windows 7.
You can also try your hand with DOS commands to change the file extension on Windows 7; definitely a more geeky way to get things done!
Note #2: The newer PHP versions come with two files: php.ini-development and php.ini-production. The former is more suited for a developer machine such as yours, while the latter is for web servers that host ‘live web sites’ where security is of paramount importance. Thus, use php.ini-development instead of php.ini-production.
Configuration Apache 2.2 web server for PHP installation
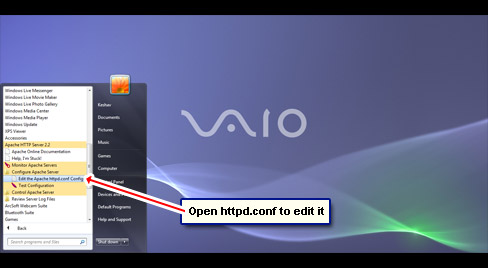
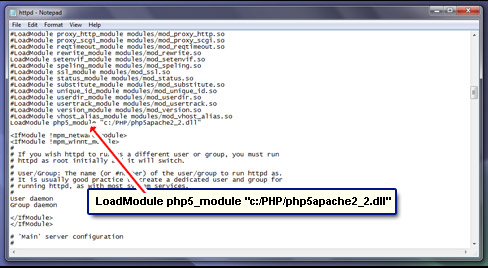
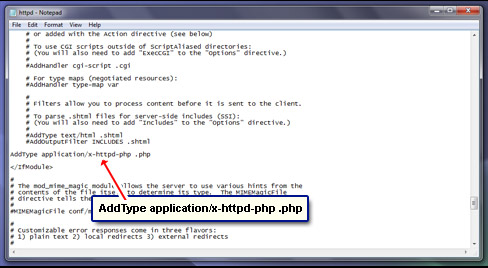
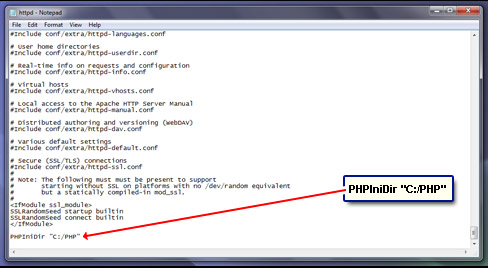
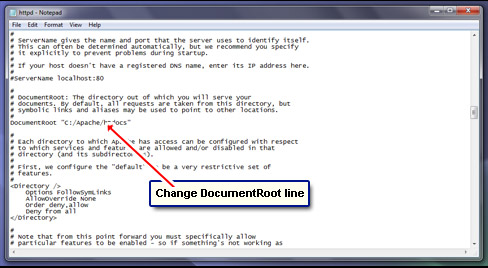
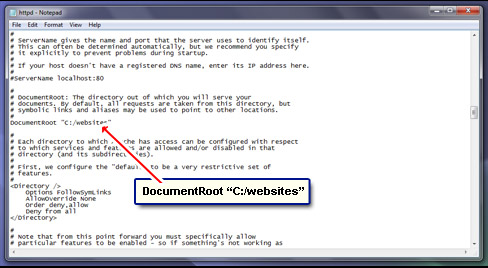
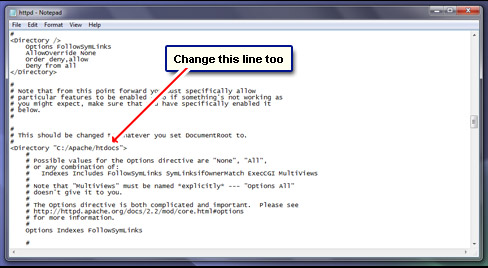
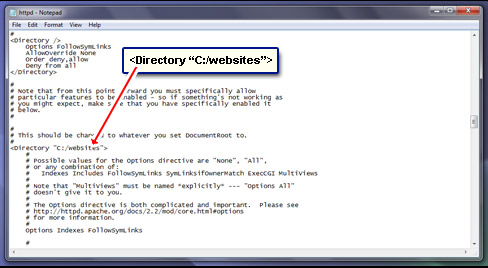
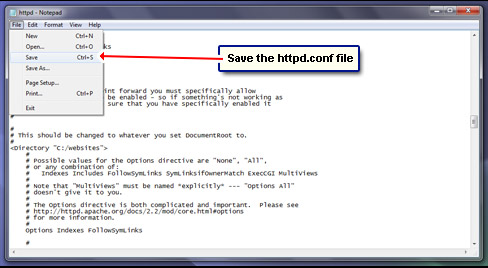
Though you have been able to put PHP on your computer, it’s still not “installed” in the true sense of the word. We have to help the Apache web server communicate with PHP. This is done by editing the Apache configuration file, httpd.conf.
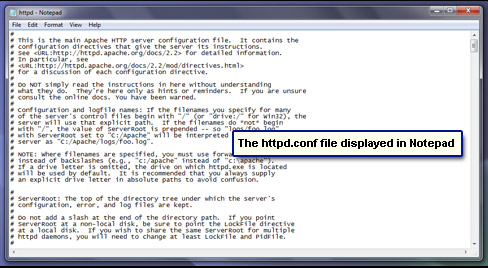
Go to All Programs -> Apache HTTP Server 2.2 -> Configure Apache Server -> Edit the Apache httpd.conf Configuration File [Slide 8]. This opens httpd.conf file in Notepad [Slide 9].
Gear up to make some changes to this file and please check the screenshots in the slideshow as you go along.
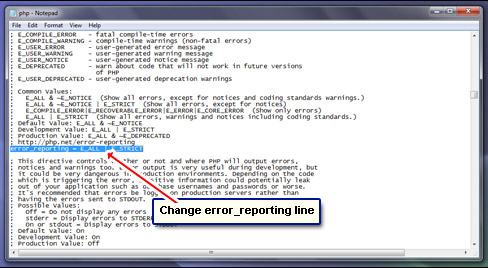
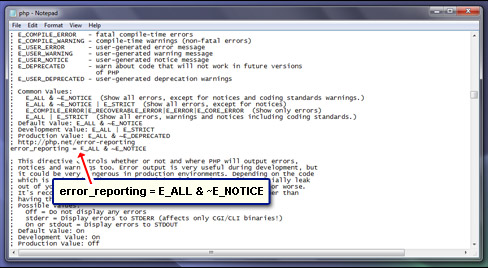
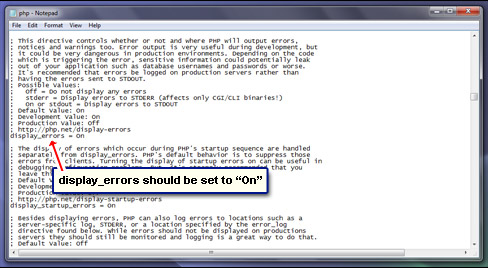
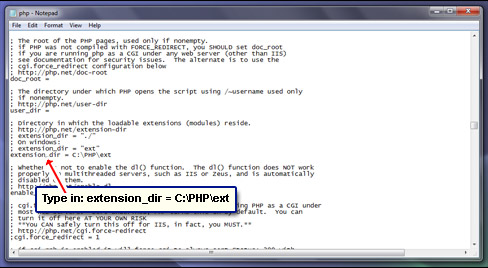
Edit php.ini – PHP configuration file
Testing the PHP installation
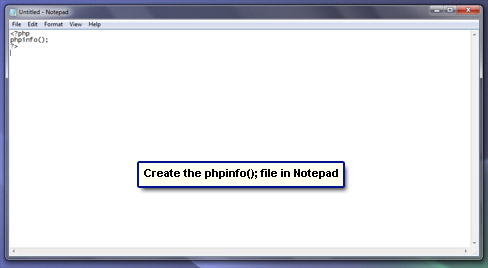
It’s now time to test whether PHP was properly installed on Windows 7. Open a blank Notepad window and type in the line below exactly as it appears – you can copy-paste if you want.
<?php phpinfo(); ?>
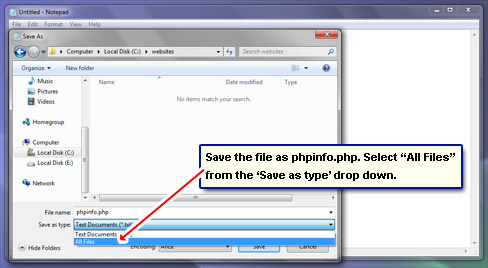
Save this file as phpinfo.php in the document root folder which should be C:/websites if you have followed my suggestion.
IMPORTANT: By default, Notepad will save the file as .txt. So you need to select “All Files” from the “Save as type” drop down and enter the full file name in the “File name” field. Confused? Check the screenshots [Slides 23 and 24].
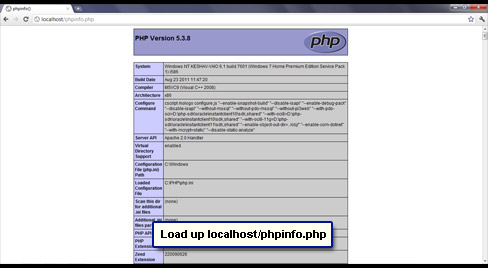
Open a browser window and load http://localhost/phpinfo.php. A long page with details of the installed PHP version should display [Slide 25]. If you see the PHP code instead, you’ve probably not saved the file with a .php extension.
You can also have index.php instead of index.html as the web server index file. Read that article for details.
This completes the instructions on how to install PHP on Windows 7. Your next step should be installing MySQL – keep reading.
Problems in installing PHP and Apache set up
Problem #1 – Cannot load php5apache2_2.dll: The installation of Apache web server and PHP should go pretty smoothly if you’ve followed my instructions to the T. However, some people have mentioned getting a “Cannot load php5apache2_2.dll” error. This message is displayed because the web server cannot find the PHP dll file. For a detailed solution, please refer Apache cannot load php5apache2_2.dll – file not found blog post.
Problem #2 – Requested URL not found: Not Found – The requested URL /phpinfo.php was not found on this server. Assuming, you had followed the steps exactly as detailed above, the only reason you are getting this error is because you haven’t restarted the computer after modifying the Apache configuration file. The web server has to be restarted properly for the changes in the httpd.conf to take effect.