There are many free online services through which you can get an avatar in a couple of minutes. Simply upload a picture from your computer, apply effects (if available) and/or crop the photo to get your avatar.
However, on these services, there is only so much that you can do with a photo. For complete control, I suggest an image editor to change your photo to an avatar any way you like. This way you get to customise the avatar by applying filters and effects that suit your needs and you don’t need to be constrained with just one program.
Sponsored Links
Now you can either use a dedicated program such as Adobe Photoshop (expensive) or use a neat free alternative, Pixlr.com. I suppose the majority would go in for the latter, right? Furthermore, Pixlr image editor is online which means you don’t need to download or install any software. So without further ado, let’s see how we can change your photo to an avatar. The screenshots are available in the slideshow below – consult these when in doubt.

- Open Pixlr.com web site in a browser window.
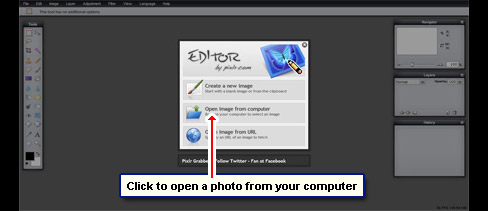
- You now have to provide the editor with a photo and there are two ways to do this – upload a picture from your computer or specify the URL (if it’s on the web). We are going ahead with the first option.
- Click on “Open image from computer” and browse to the directory that holds your photos. Select it and open [Slide 1].
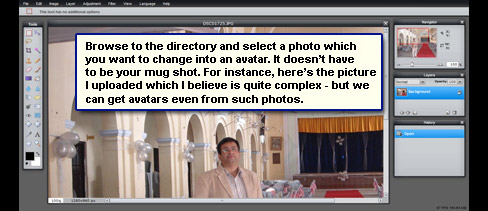
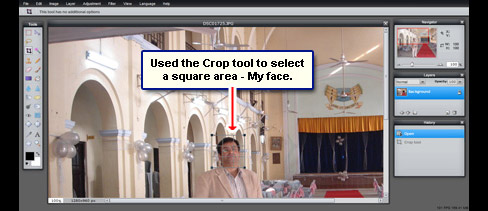
- I have on purpose chosen a complex picture. This is to show you that we can change any photo to an avatar… it doesn’t have to be just your mug shot [Slide 2].
- The first thing is to ‘take out’ my face from the photo. For this we shall use the Crop tool so go ahead and select it. Now click on the photo and drag to mark out the area you want. Release the mouse button when satisfied [Slide 3]. Not happy with the selection? Change it by clicking and dragging the corners of the grid. Keep an eye on the dimensions of the selection which will be shown in pixels. You will find these in the “Navigator” pane. I recommend creating a square avatar, unless you know what you are doing.
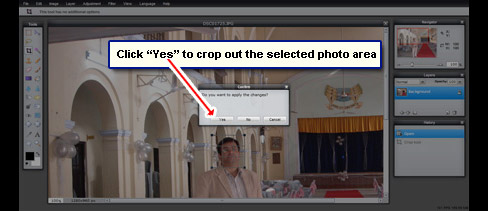
- Click elsewhere on the photo and a small pop-up asks whether you would like to go ahead with cropping; click “Yes” to confirm [Slide 4].
- Though this square-shaped cropped part can alone suffice as an avatar [Slide 5], it’s too plain. We need to spice it up.
- The following steps won’t be easy for first-timers but remember, you don’t have to follow exactly what I have done. Make your own choices and if you do mess up or want to undo an action, simply use the Ctrl-Z key combination. Pixlr.com editor has many effects that you can apply to your photo. Experiment with these to get something unique and eye-catching.
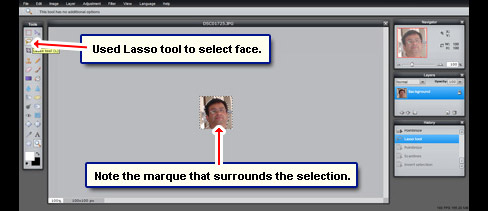
- With the Lasso tool (free hand selection tool), I selected just the face. Tip: use the zoom tool (magnifying glass icon) to enlarge the image. Once the selection is complete you’ll see a marquee around it [Slide 6].
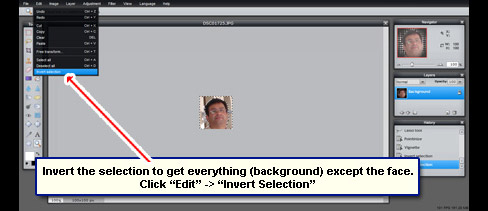
- But since I want to work first on the background, I inverted the selection: “Edit” -> “Invert selection” [Slide 7].
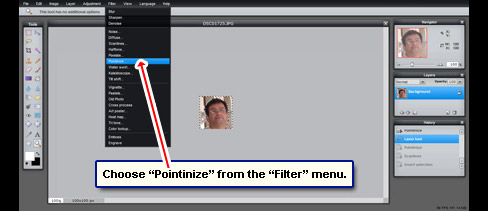
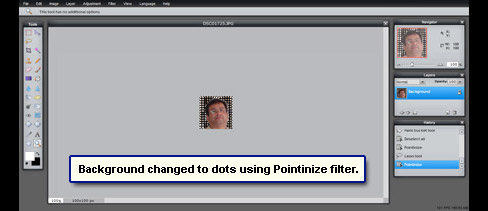
- I then picked “Pointinize” from the “Filter” menu which changes the background to dots. Note: the filter works only in the selected area [Slides 8 and 9].
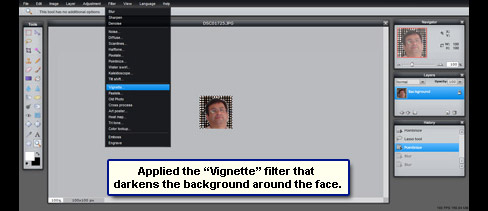
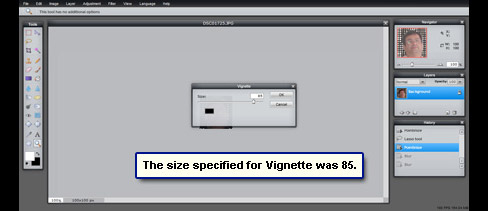
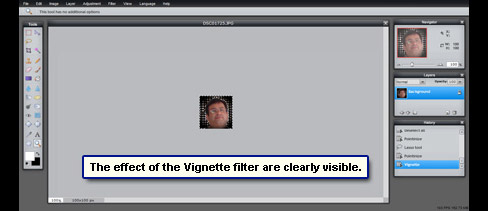
- The next step was to use “Vignette” filter with a value of 85. This darkens the background slightly helping the face to stand out [Slides 10, 11 and 12].
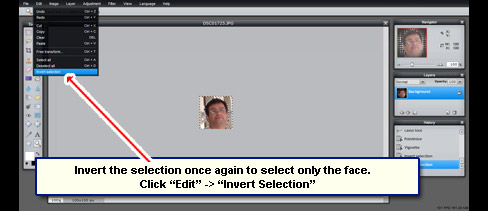
- Time to change the change the face so it looks more ‘avatarish’, if you know what I mean. Invert the selection by choosing “Invert selection” from the “Edit” menu [Slide 13].
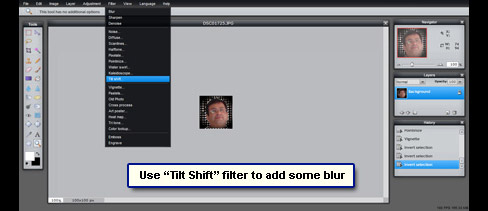
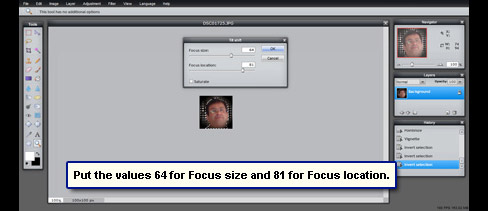
- From the “Filter” menu, I choose “Tilt shift” which adds a kind of blur to the head and neck area. Values used were 64 for Focus size and 81 for Focus location. Note: You don’t need to put the exact same values, use ones that will be suitable for your photo [Slides 14 and 15].
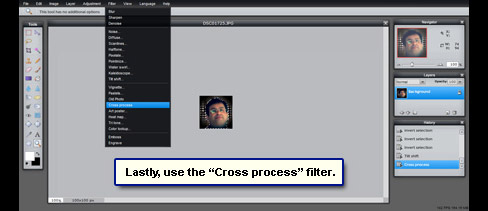
- Lastly, I applied the “Cross process” filter [Slide 16].
- My photo has now been changed to something that looks like an avatar [Slide 17]. Let’s save it.
 Choose “Save” from the “File” menu, pick the JPG format, specify a name for the image and move the quality bar to 100 so that it’s saved in the best quality. We can decrease this later if we want. Click “OK” and download the photo avatar to a folder on your computer [Slides 18 and 19].
There you are – was it very difficult to change your photo to an avatar? And those of you who have a Yahoo account, I suggest reading how to create an avatar using the same service.
![]()